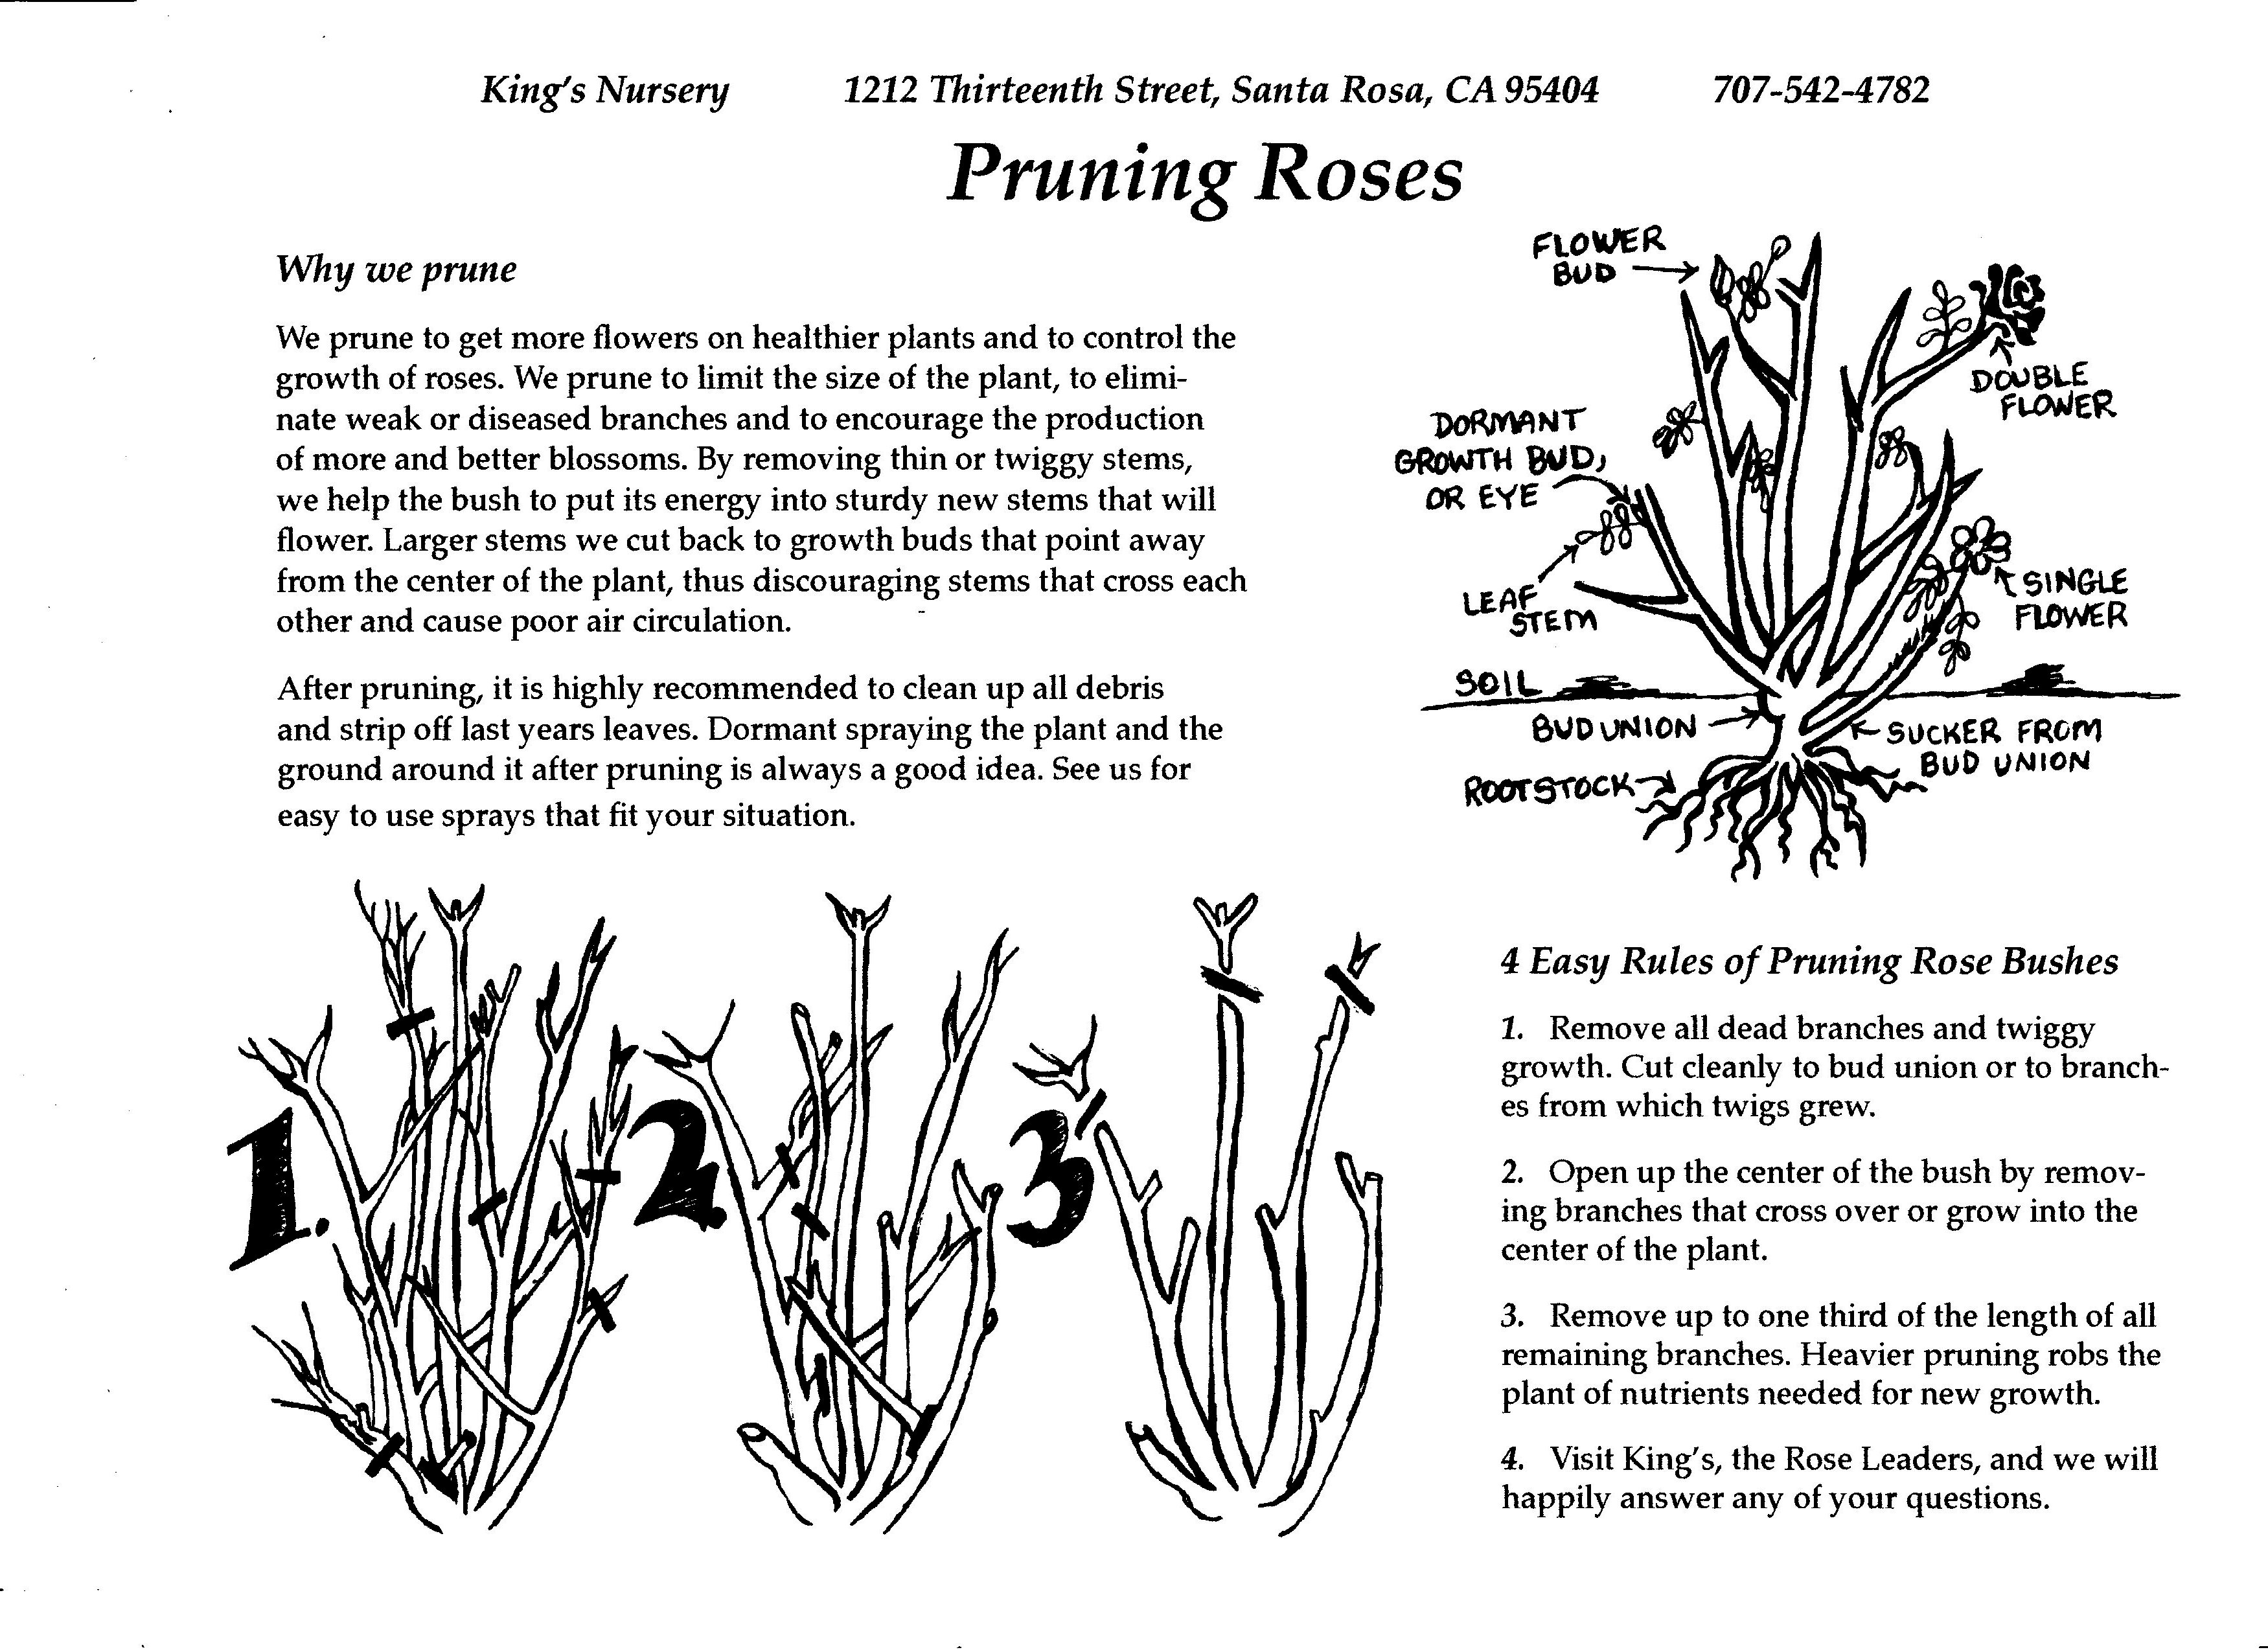
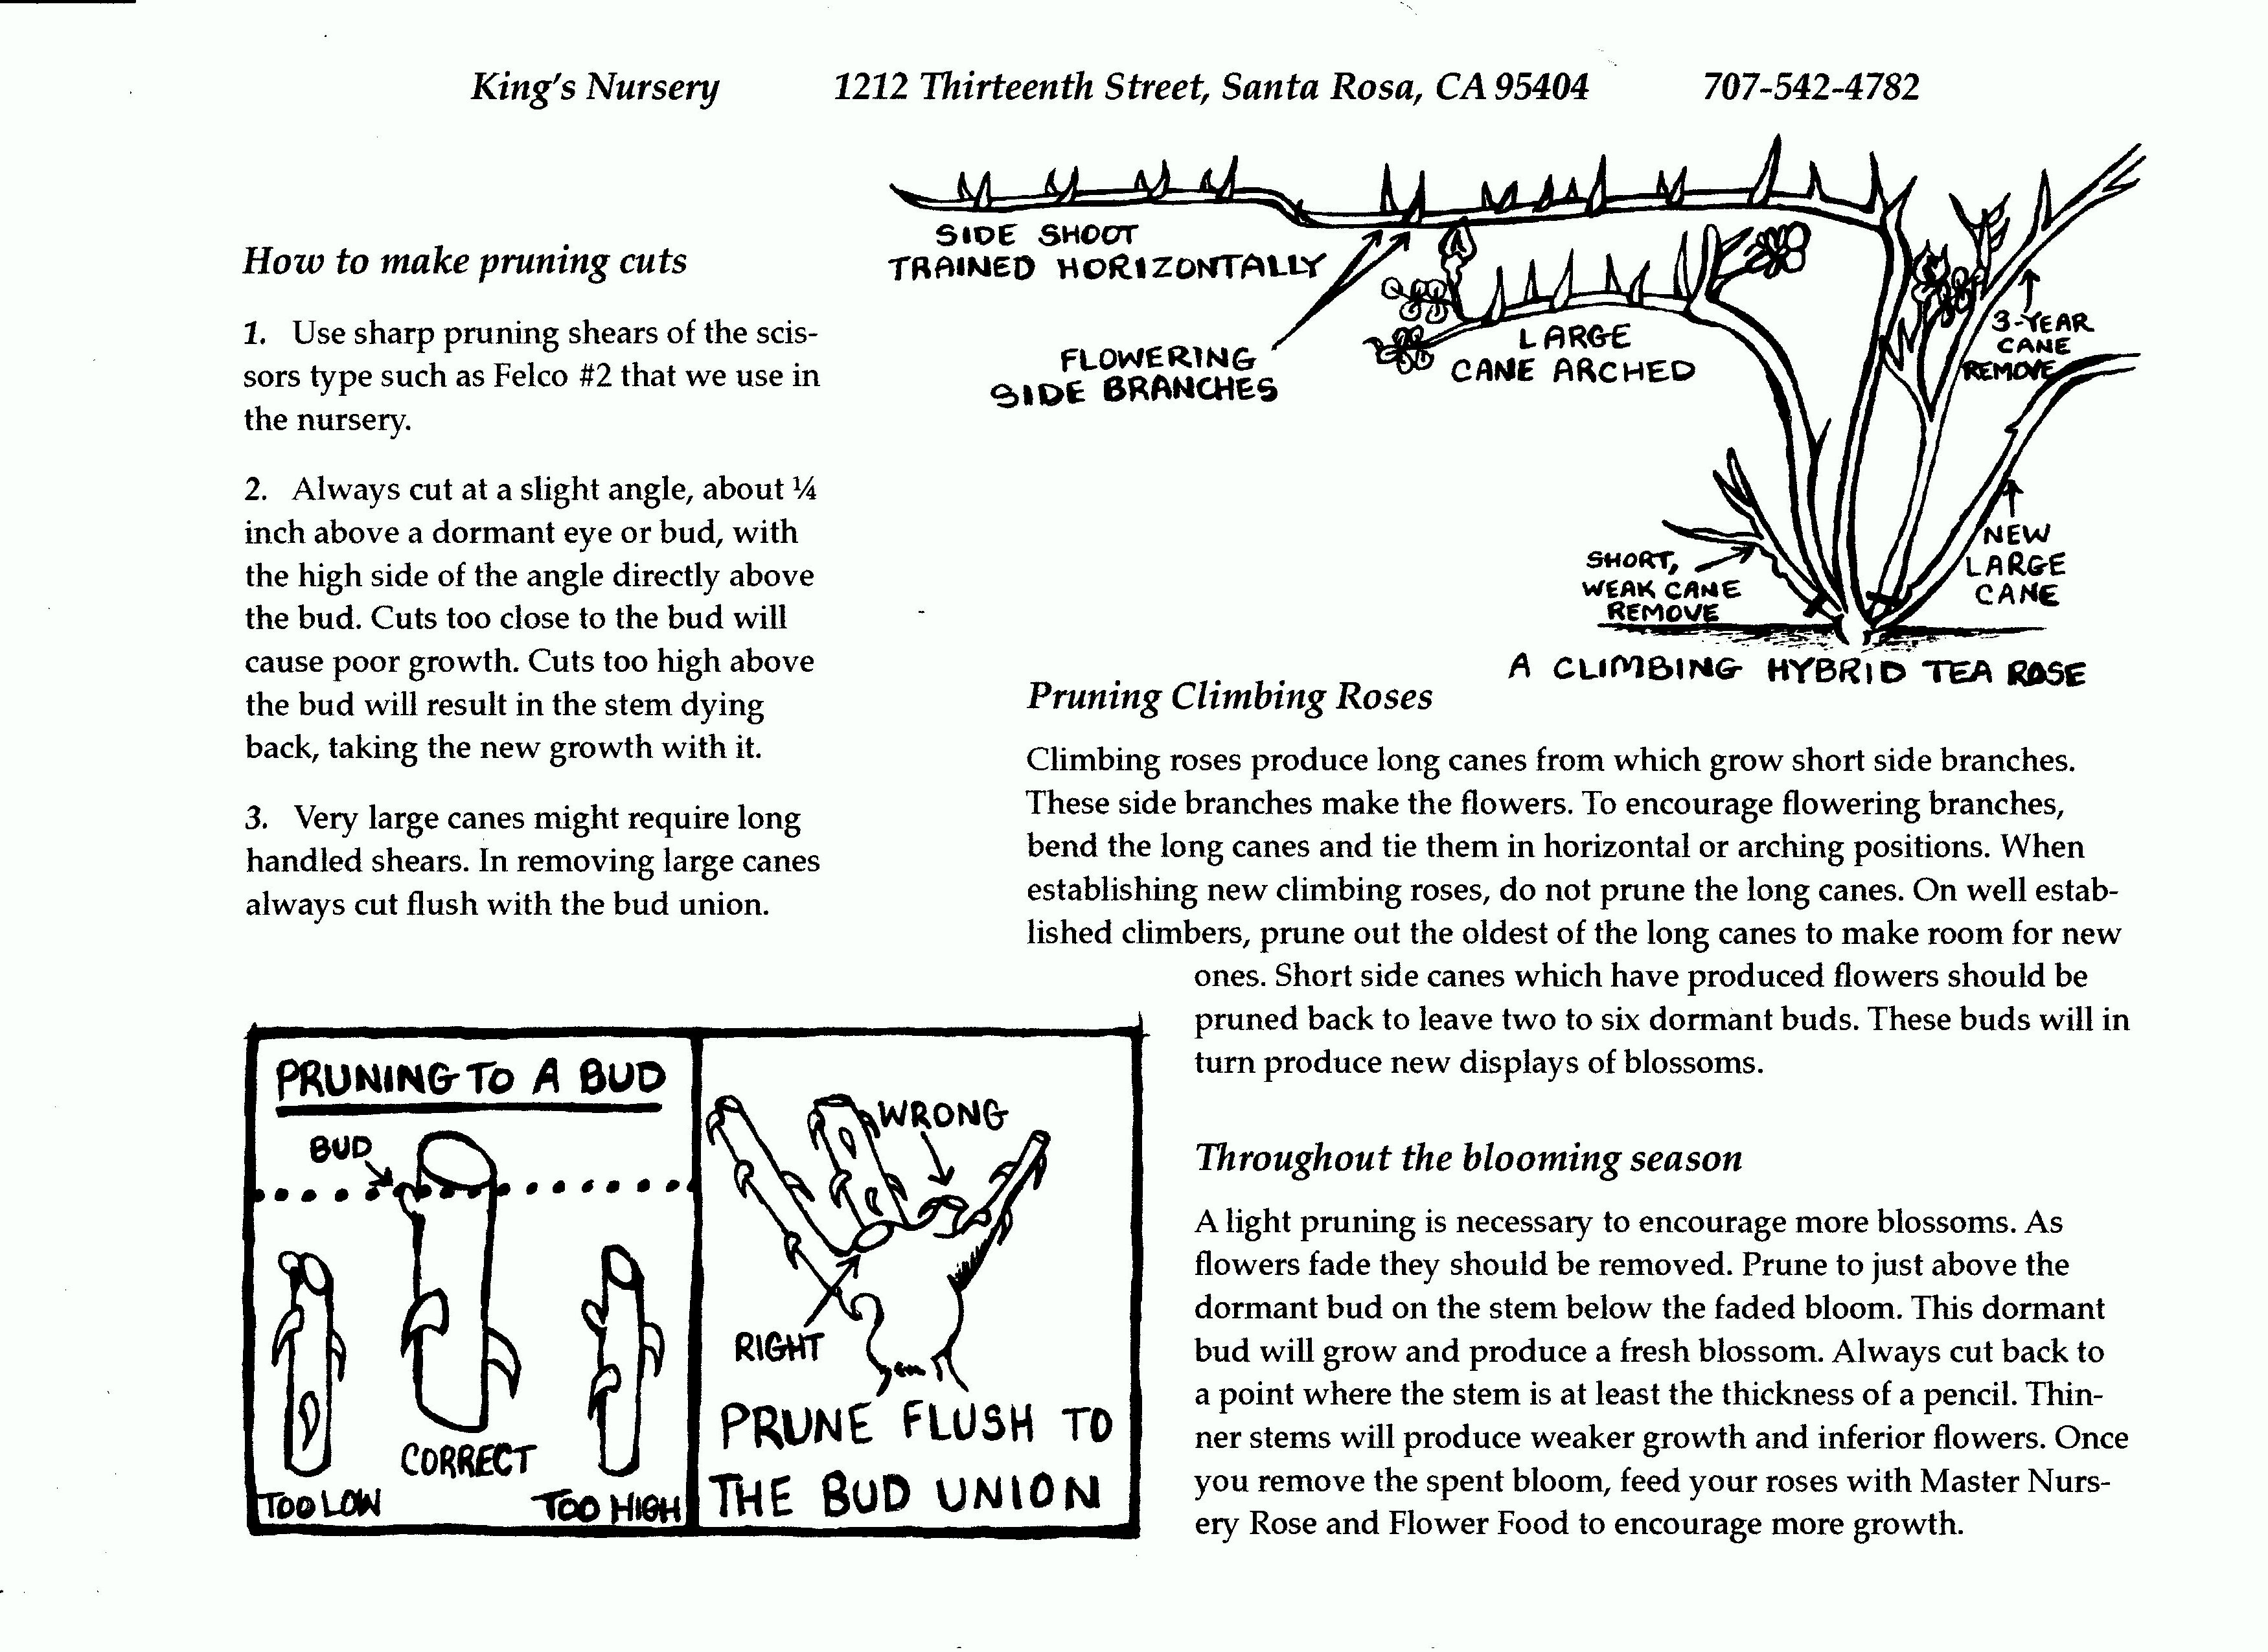
by King's Nursery | Oct 7, 2025 | General, How-to Info
Even with the cool weather, there are lots of flowering options for your yard and containers. Here in Sonoma County, we are blessed to have mild winters. Below is a general list of some things that we carry all through the Fall and Winter seasons. Stop in to see what other options we have!

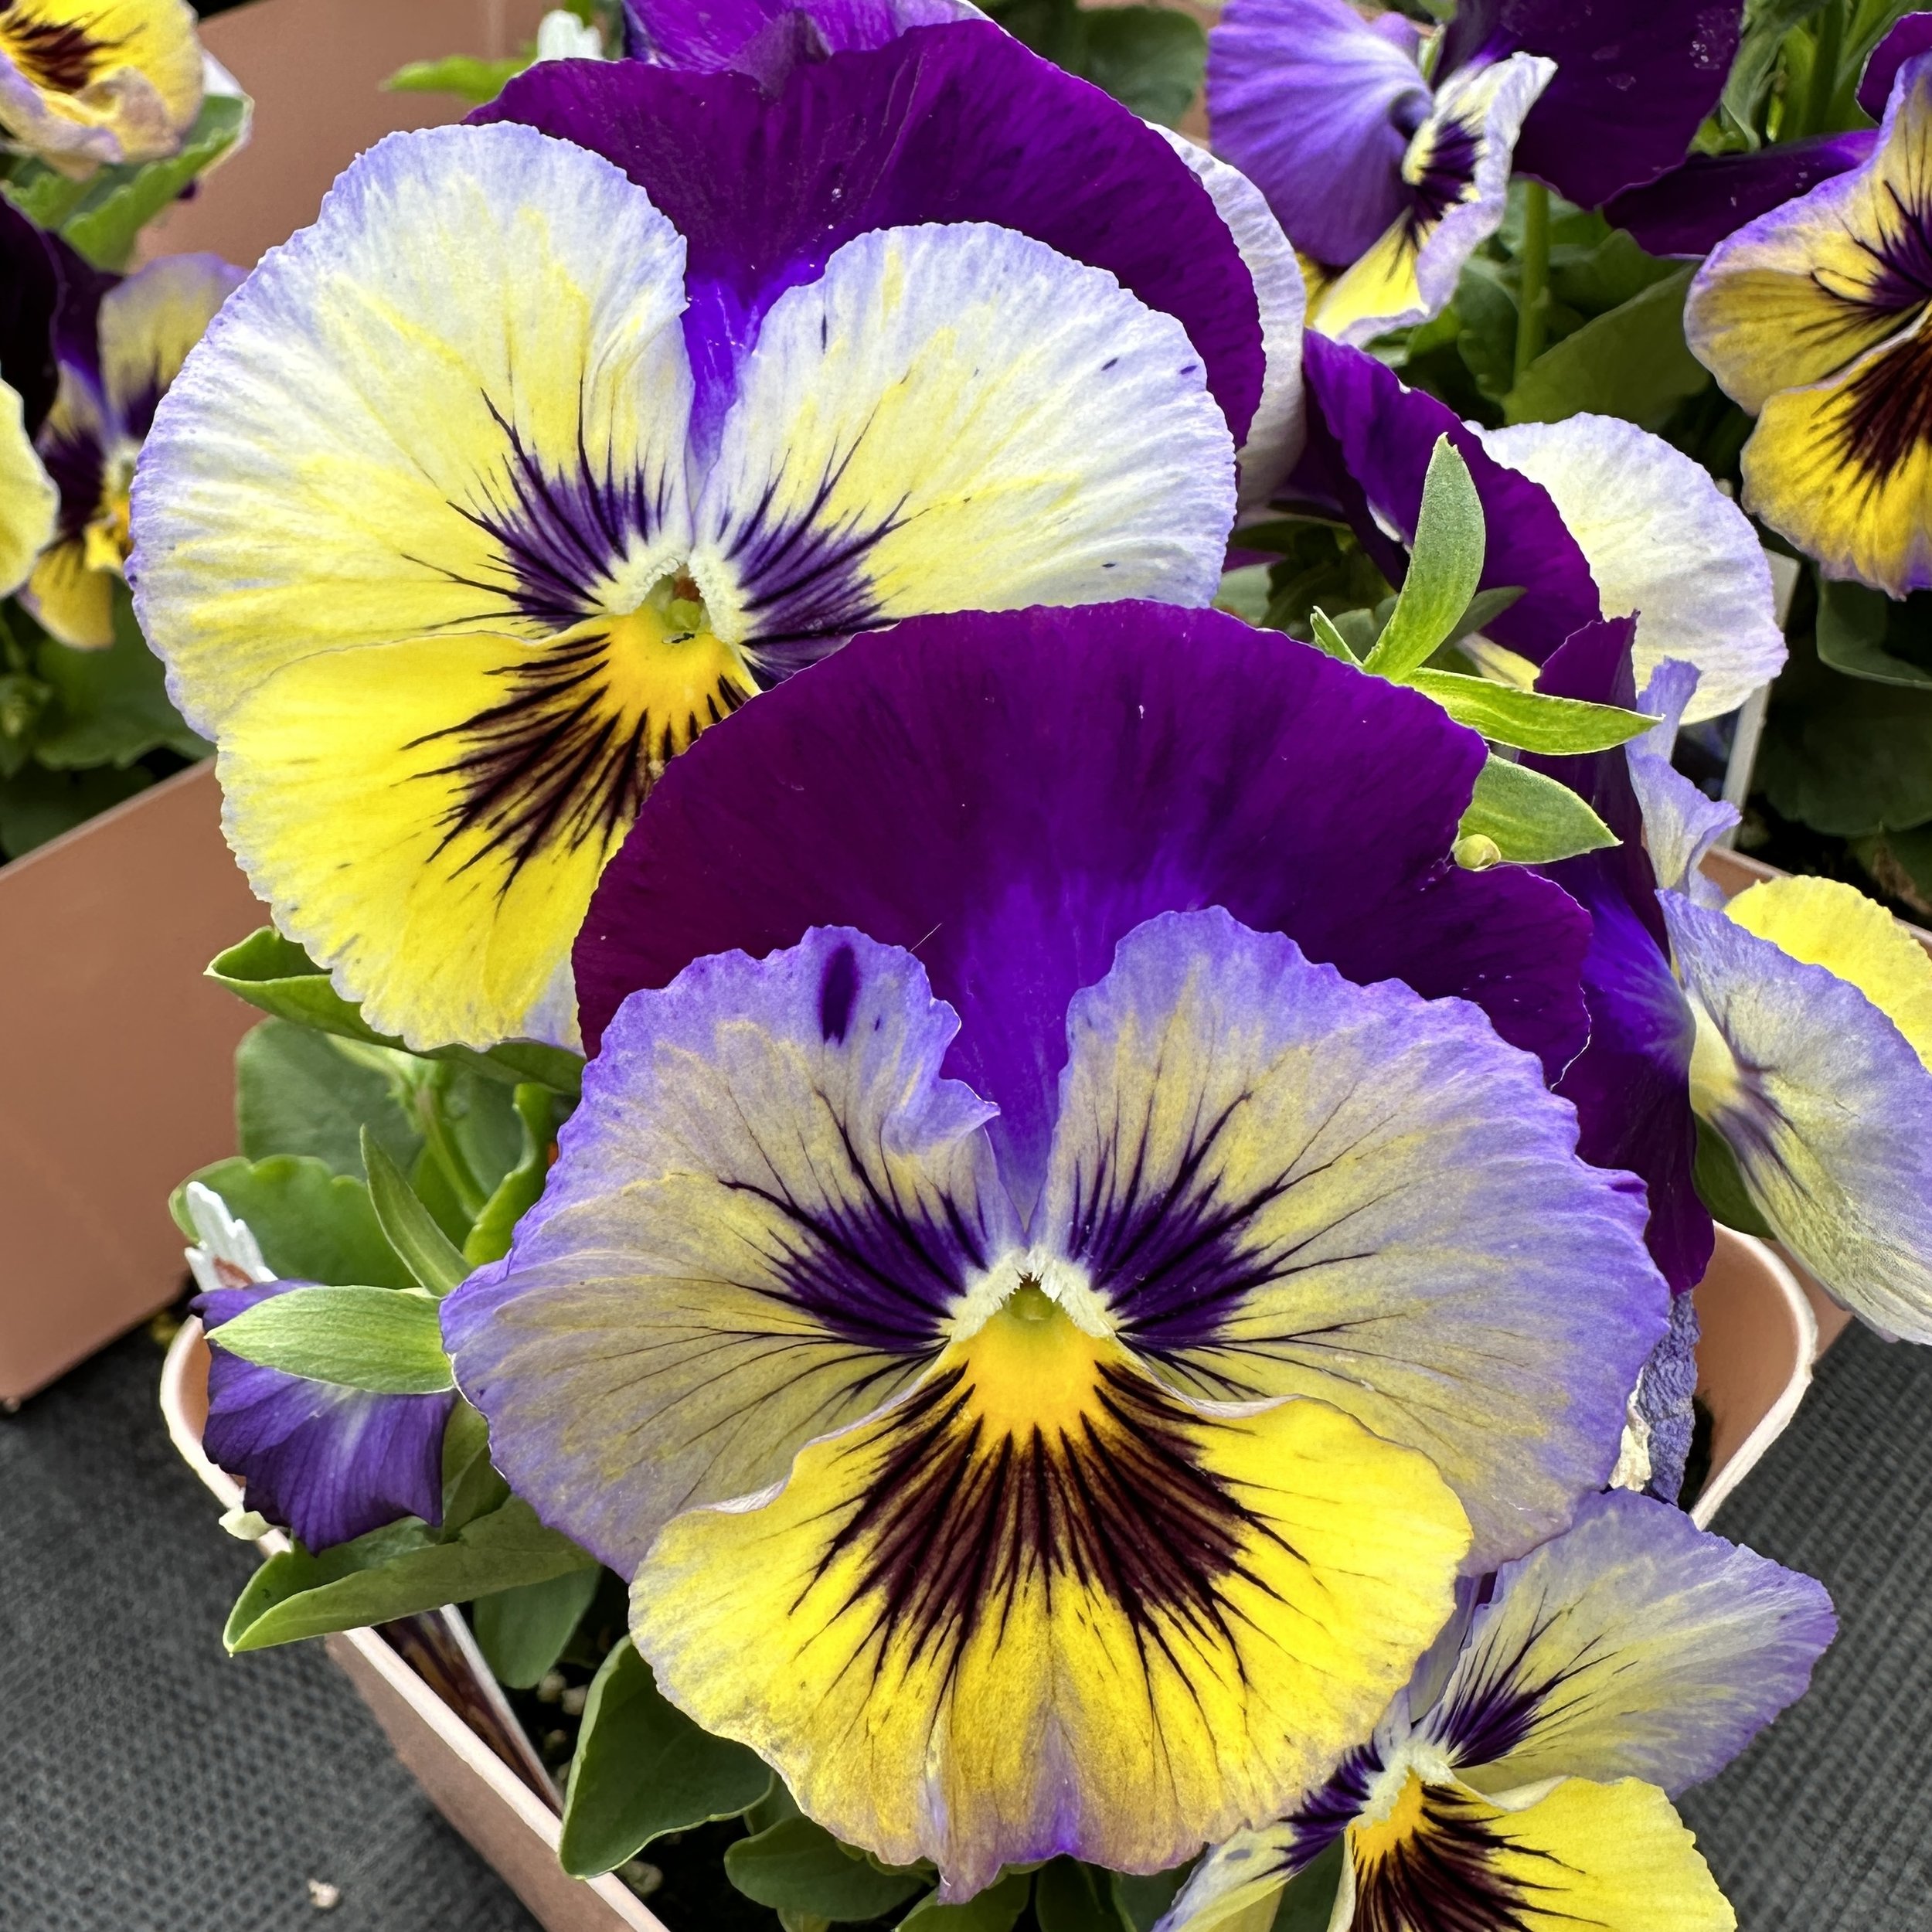
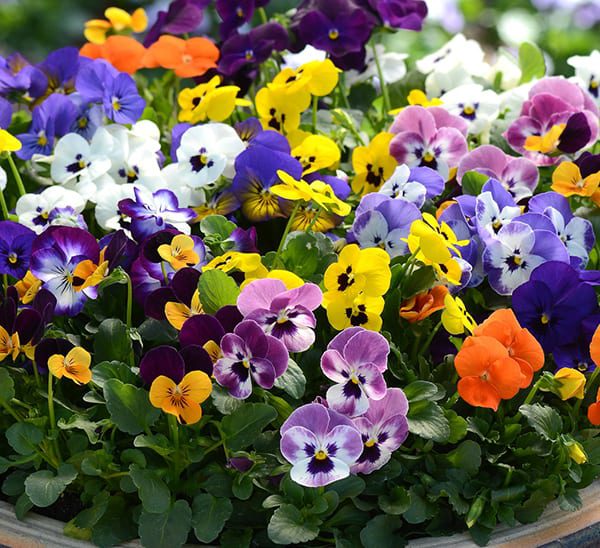
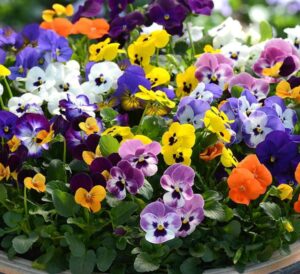
Pansy
A garden classic! Easy, full sun loving flowers that will last from Fall through Spring. Great for use as a border plant, or added in with combo pots. We love to use them in bulb planters with Tulips and Daffodils. Available in a wide range of colors.
Viola
Similar to the Pansy, Violas are a full sun bedding flower that will carry all the way from Fall through Spring. It is sometimes used as edible toppings on deserts and salads! They come in a great variety of colors to match any style.
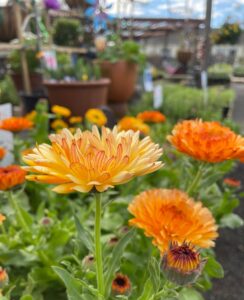
Calendula
Ruffly, bright orange and yellow flowers. Some varietals have longer stems for cold weather bouquets. Plant them along borders or for some height in combination arrangements.
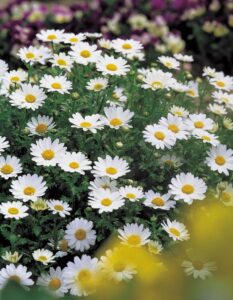
Paludosum Daisy
Low growing, spreading plants. Great along borders and as base plants in arrangements. Goes from Fall through Spring!
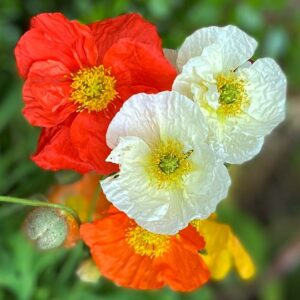
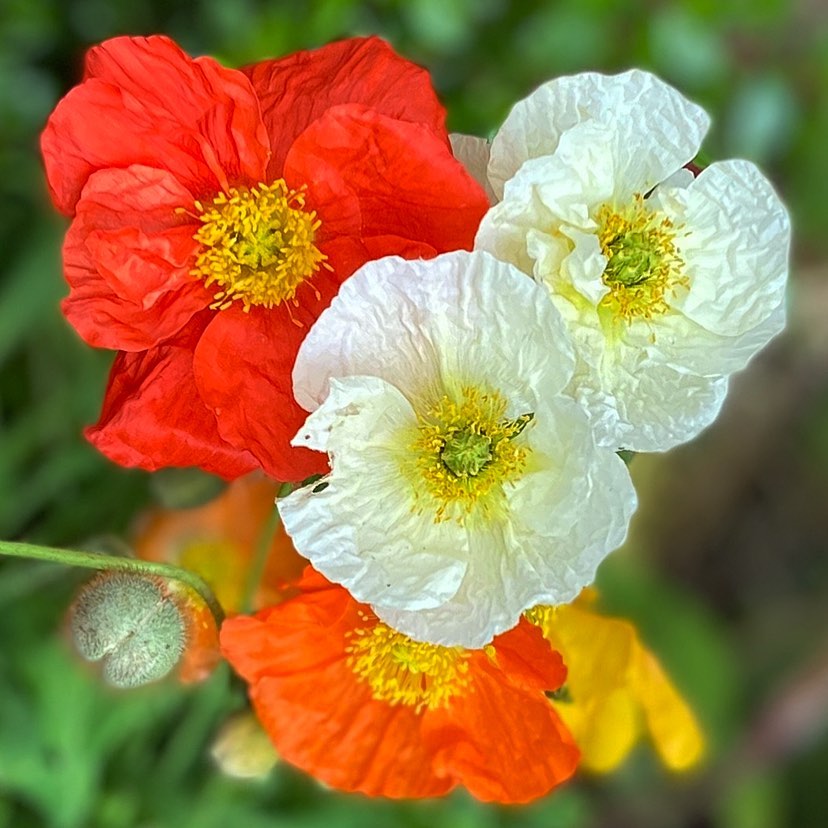
Icelandic Poppy
A fun addition to the winter garden! Very cold hardy, Iceland Poppies will keep going and going. We mix them in with Pansies and Violas for constant shows of color. Come Spring, bees will visit them often.
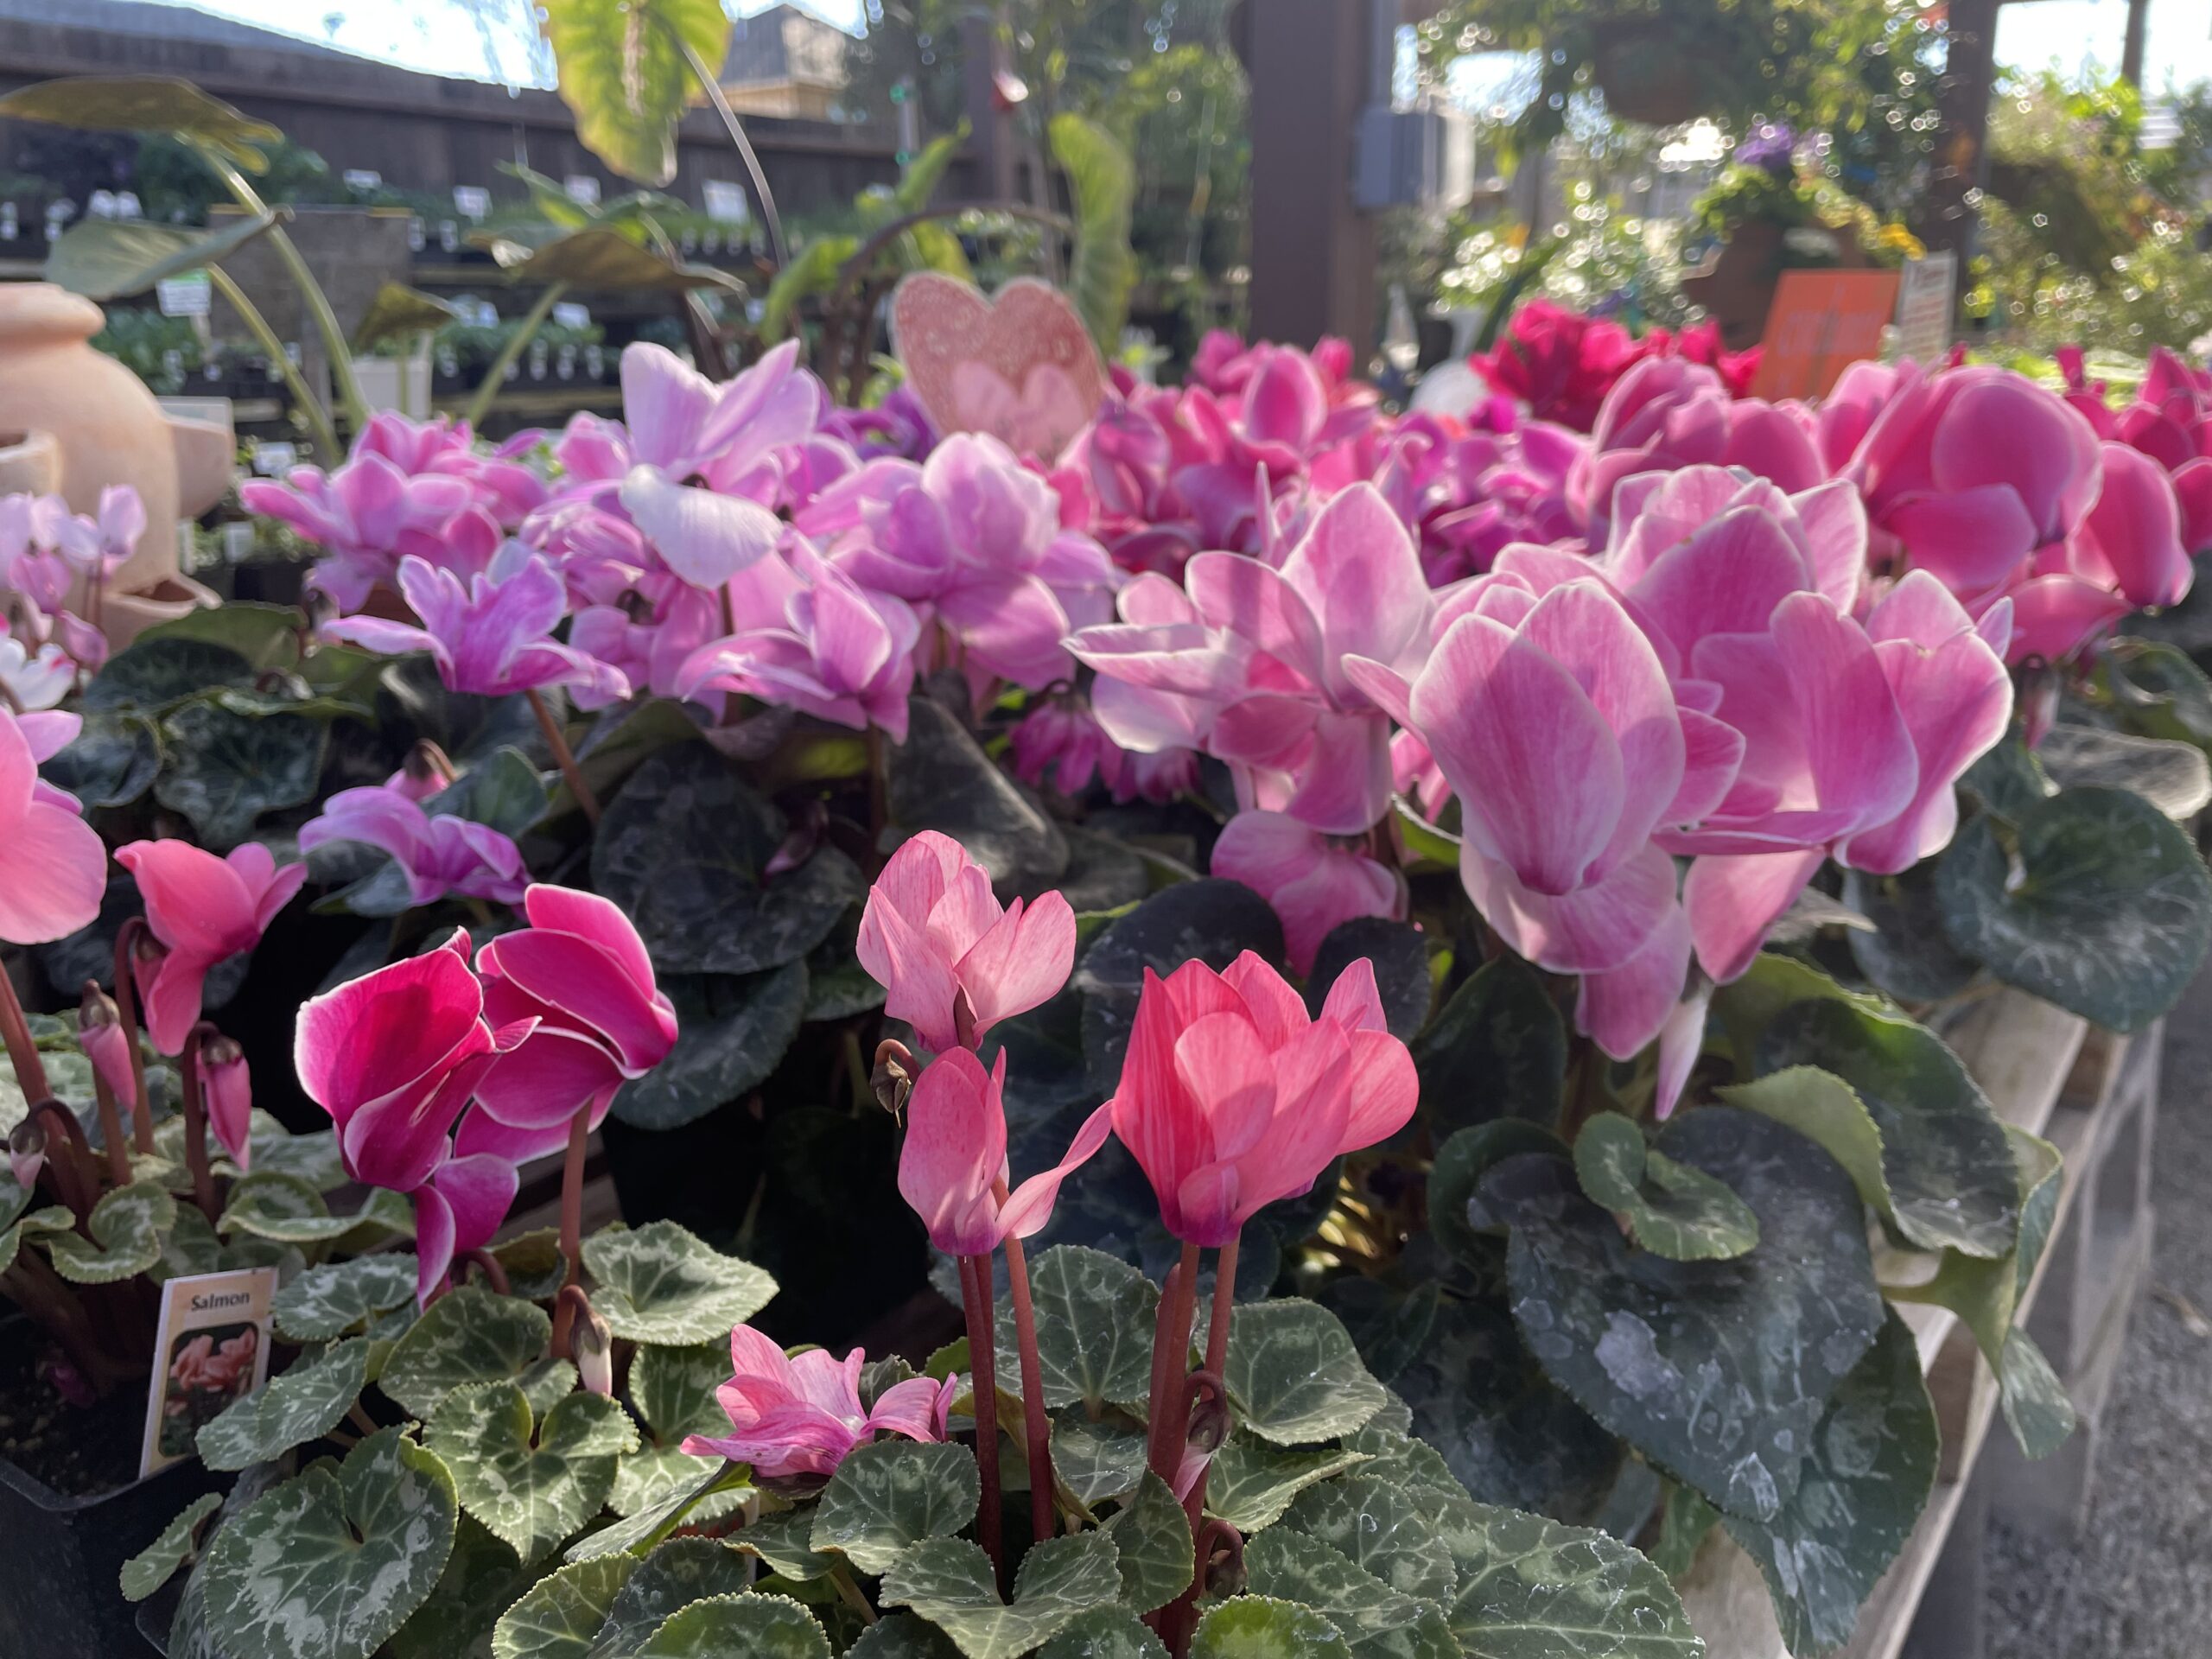
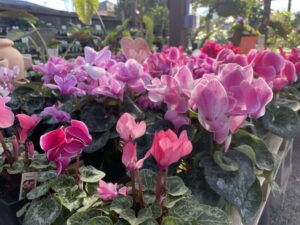 Cyclamen
A perfect option for shade gardens and containers. Nice, low maintenance plants that keep blooming all through the winter into Spring. Not very demanding, just snip off old blooms and more keep coming!

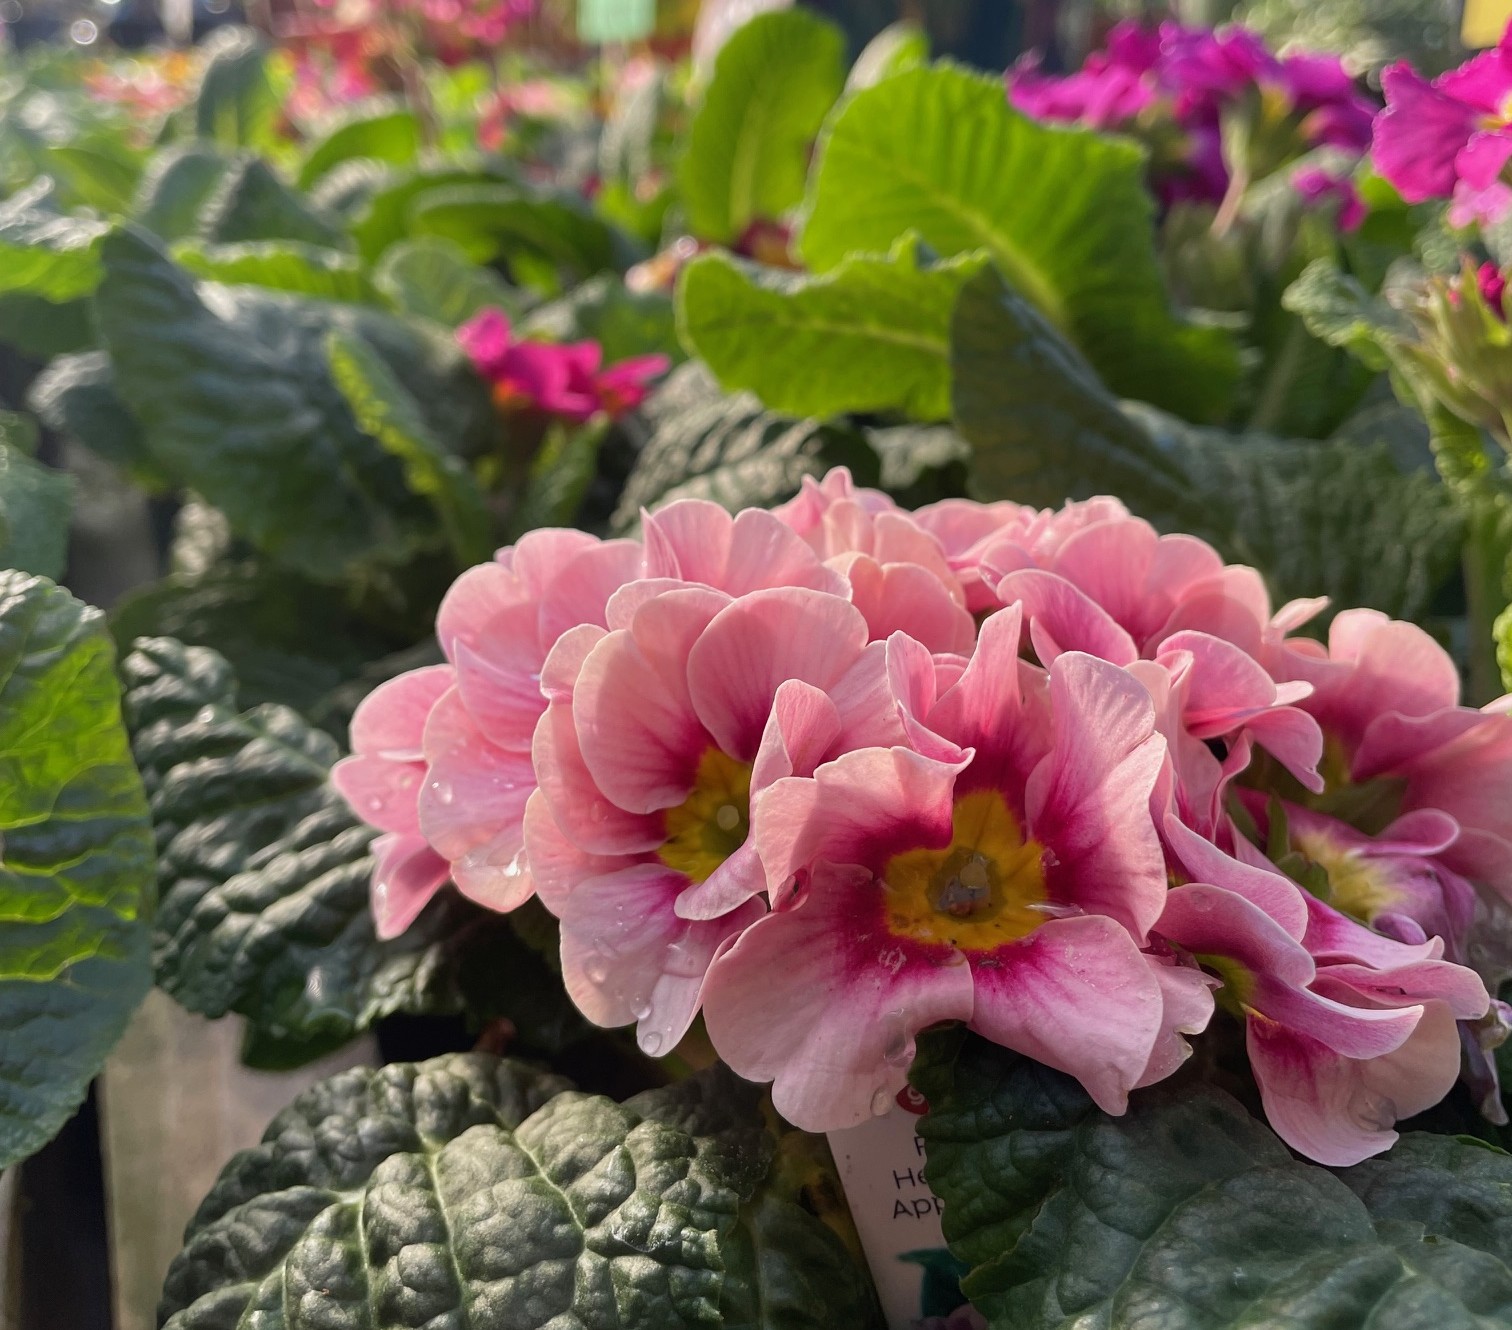
Primrose
A great cold season bloomer. Keeps going all through the cold months, and into Spring. Some varietals can come back next season. Great in hanging baskets or as a border plant in the garden.
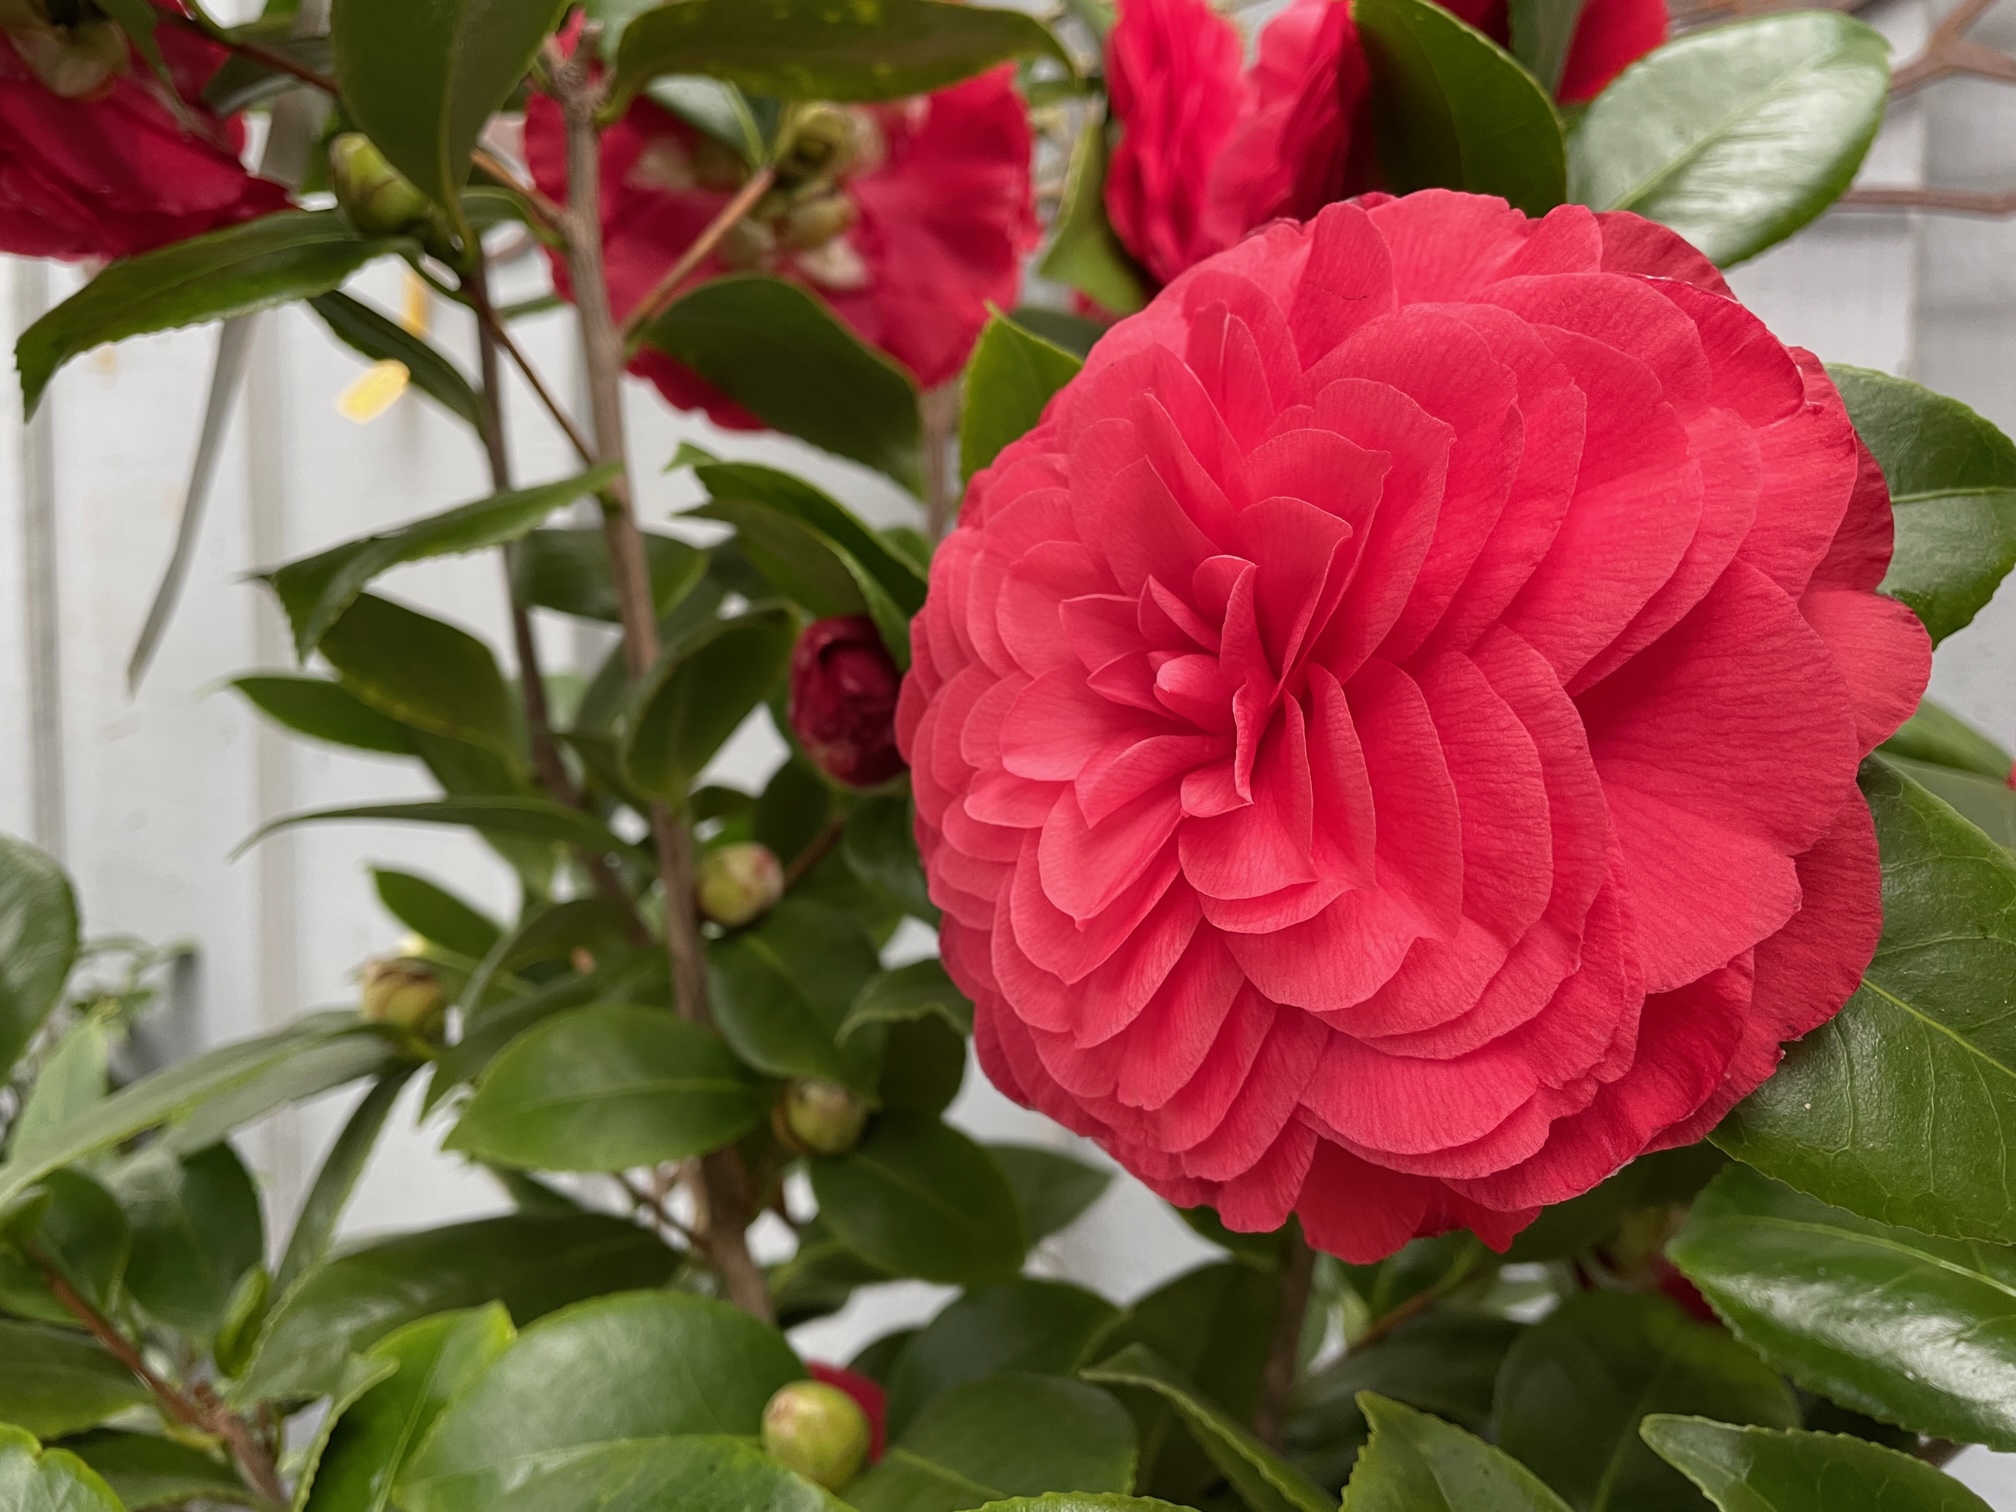
 Camellia
Camellia are evergreen, hardy shrubs. They come in a large array of sizes and colors, all boasting big showy flowers. Some varietals bloom earlier than others. Deer resistant and easy to grow!
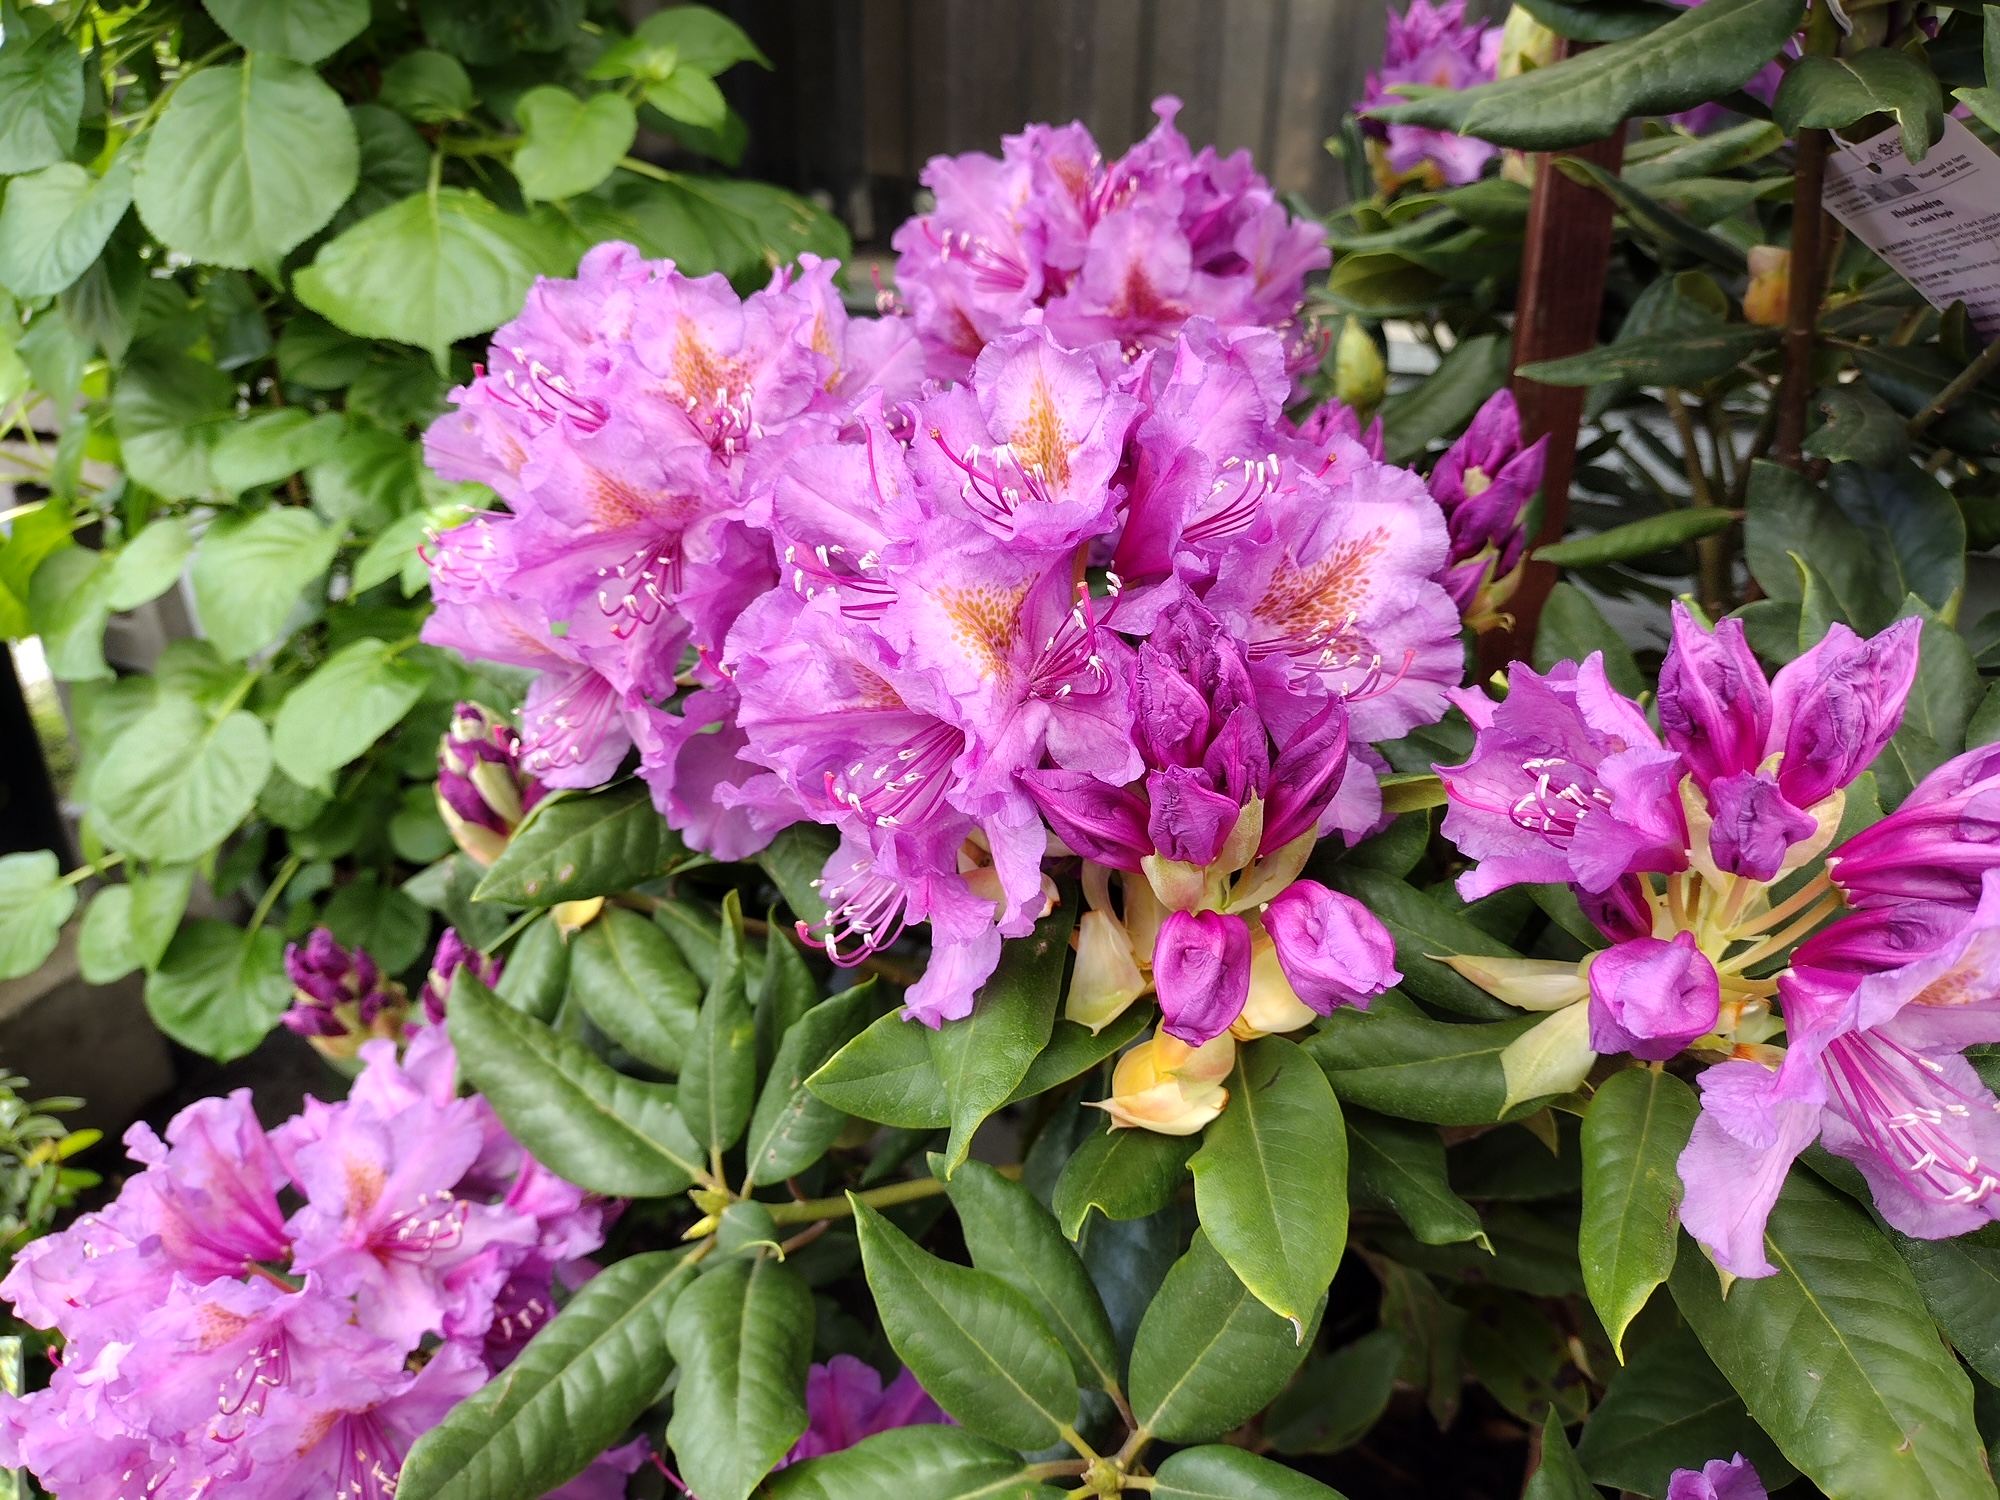
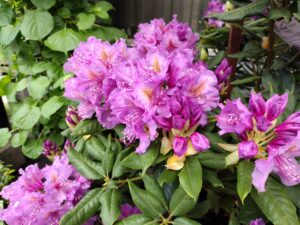 Rhododendron
BIG clusters of flowers! Evergreen, low maintenance and very showstopping. A classic beauty that brings lots of color to a shady area. Deer resistant and very hardy.
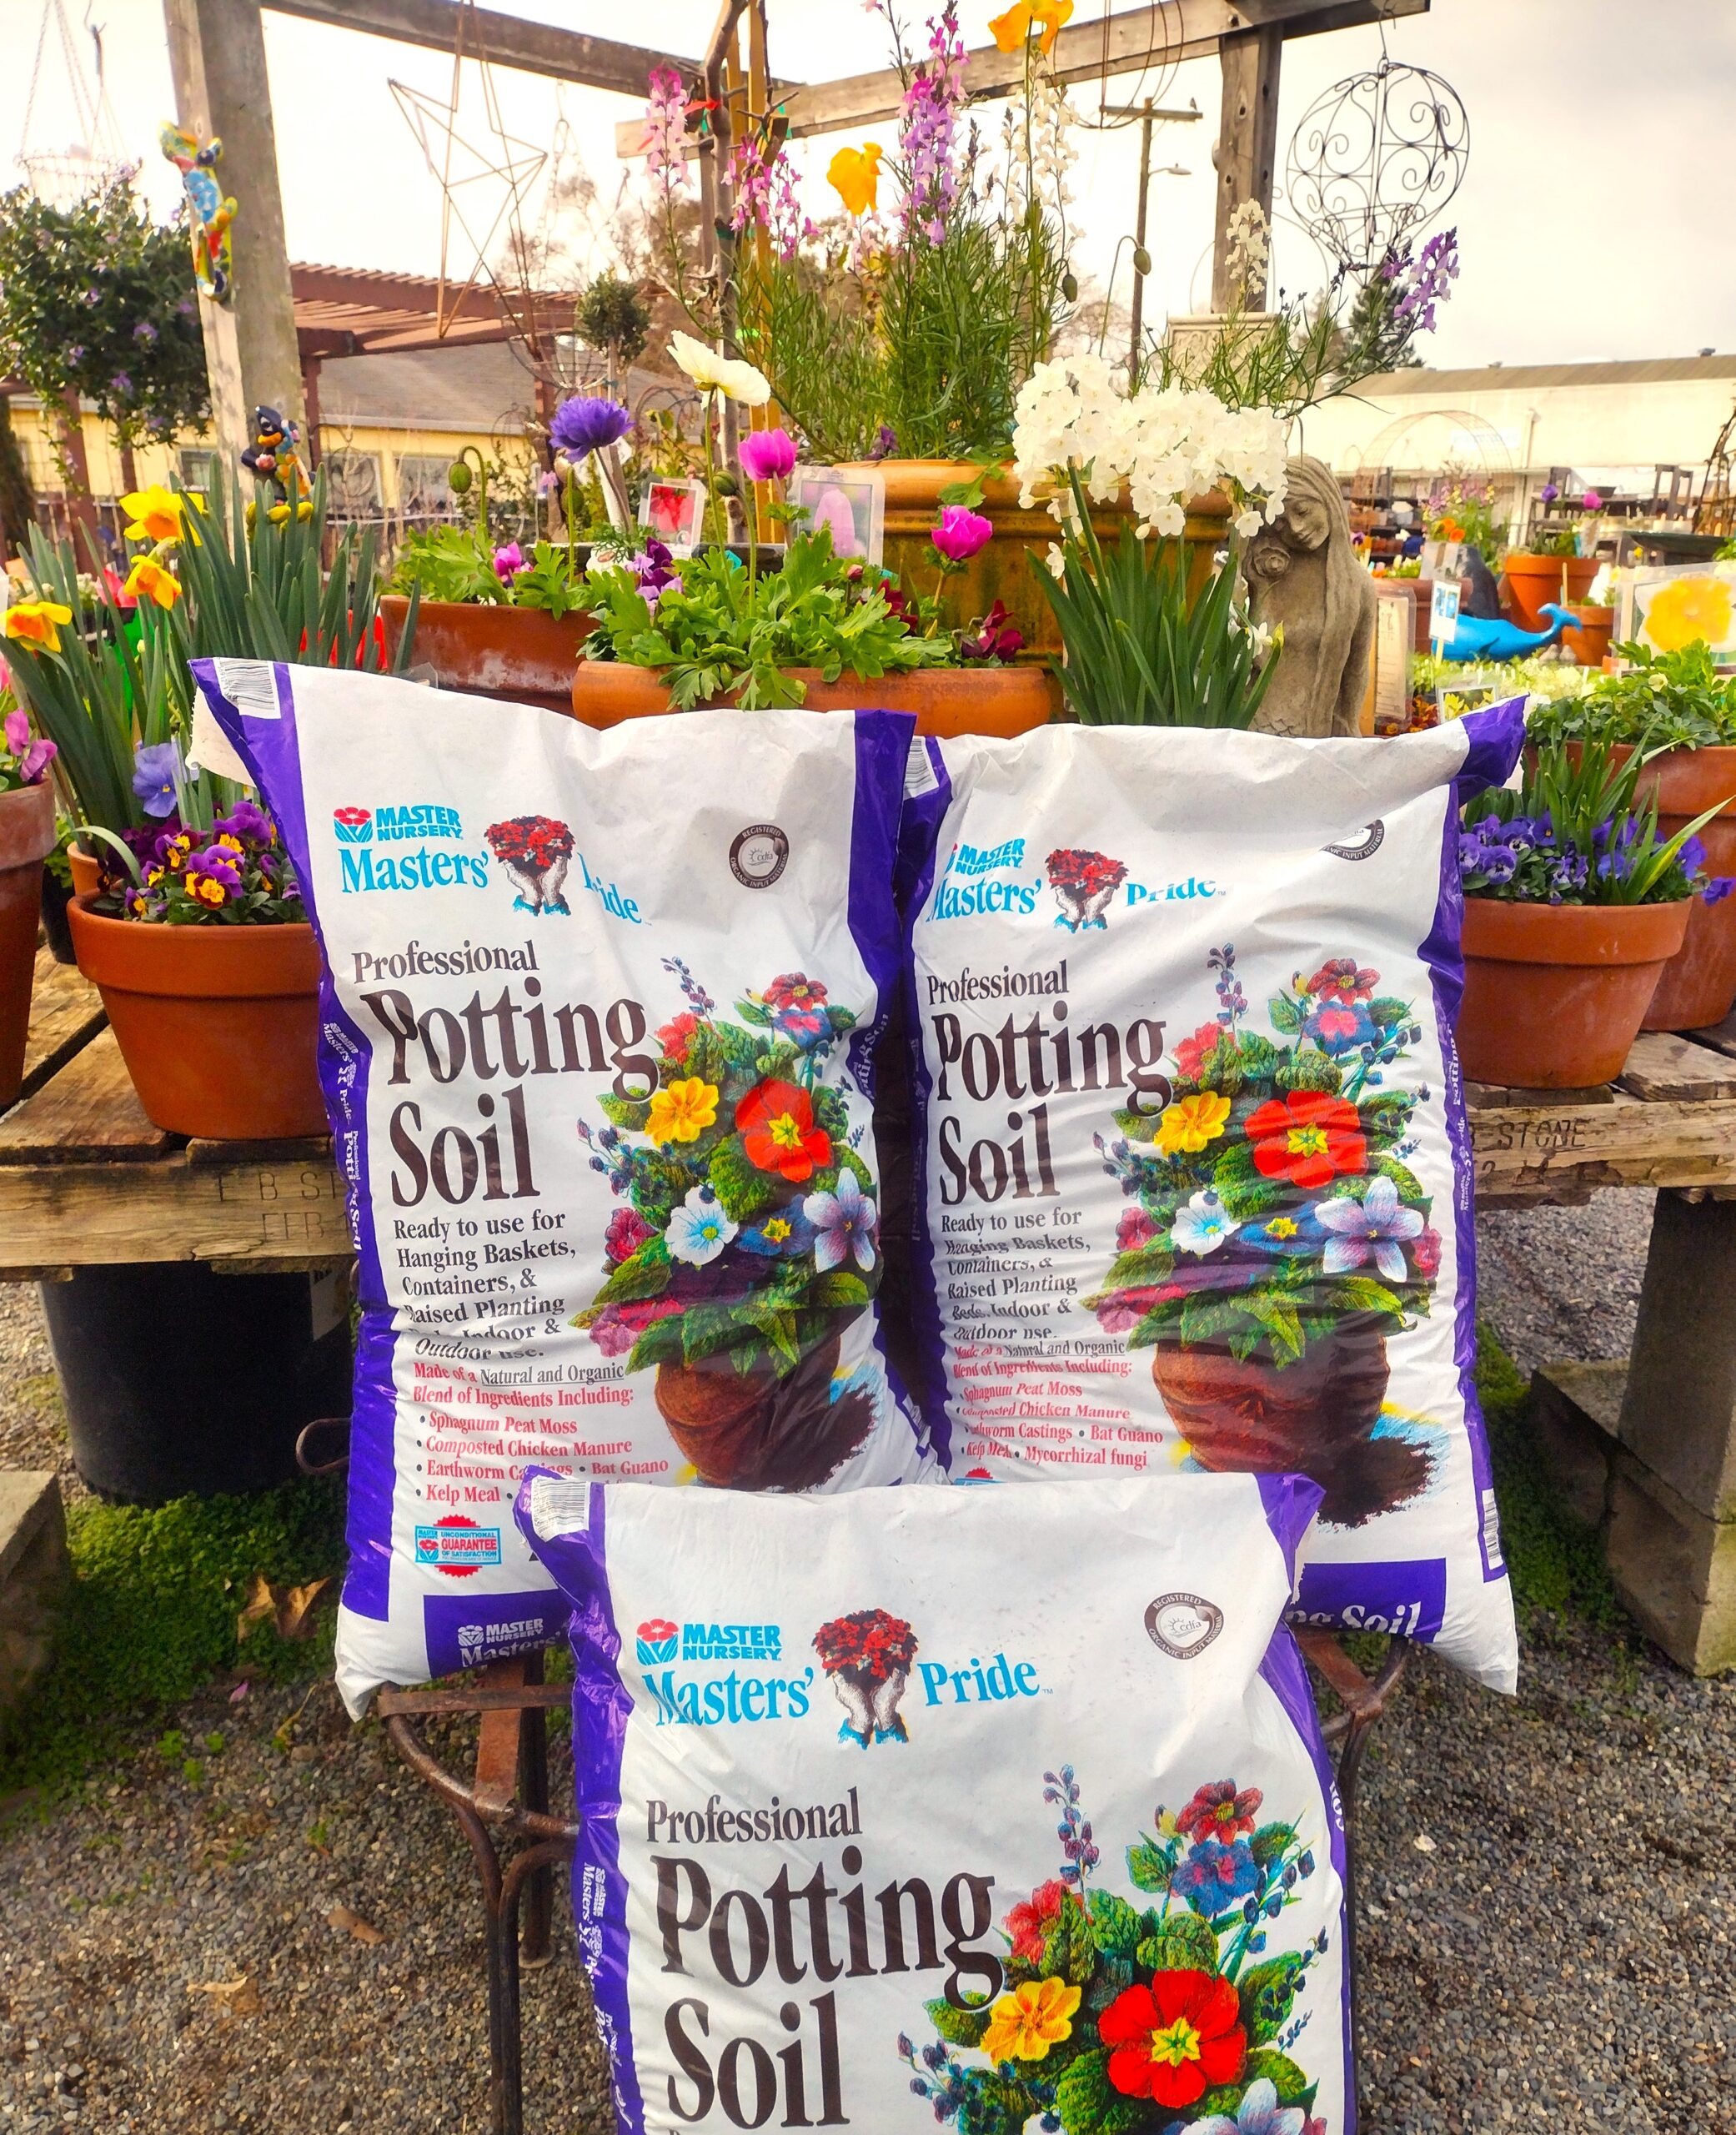
Soil Types
Setting up your flowers with the best soil will ensure you have a great batch of blooms this season. For anything going into a pot, we use Master’s Pride Potting Soil. It is well balanced, and suits the growing needs for all sun and shade plants.
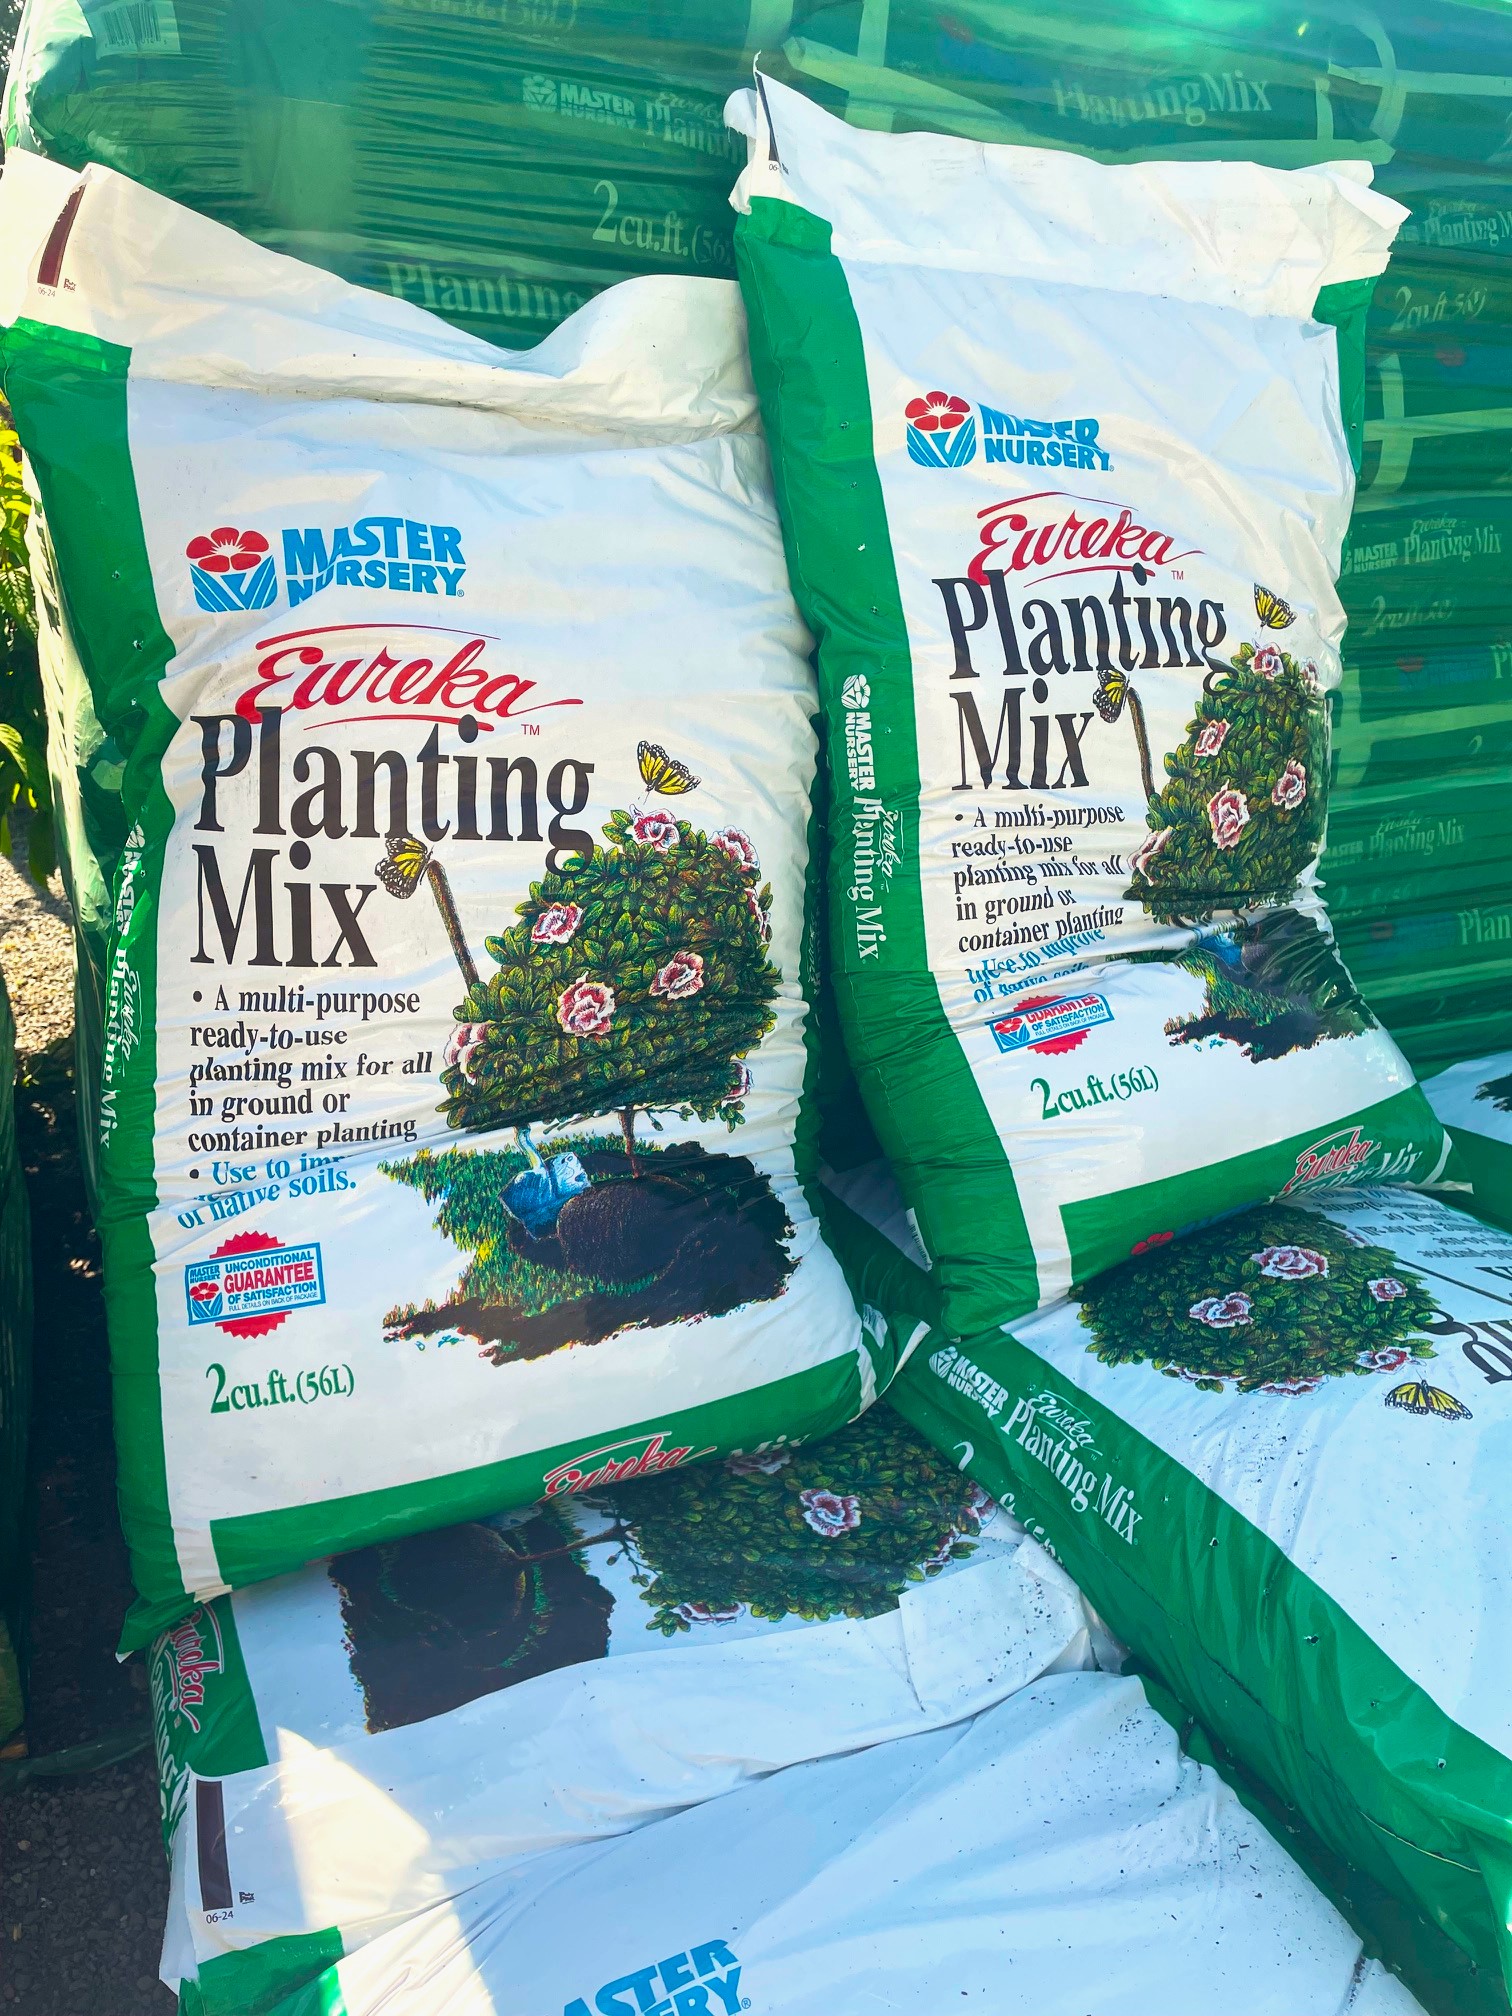
For in-ground or raised bed gardens, we recommend using Paydirt to amend the planting area. If the planting area is especially compacted, or if you need more volume to fluff things up, add in some Eureka Planting Mix. Eureka Planting Mix is also a great soil conditioner that will increase drainage and aeration.
Fertilizing
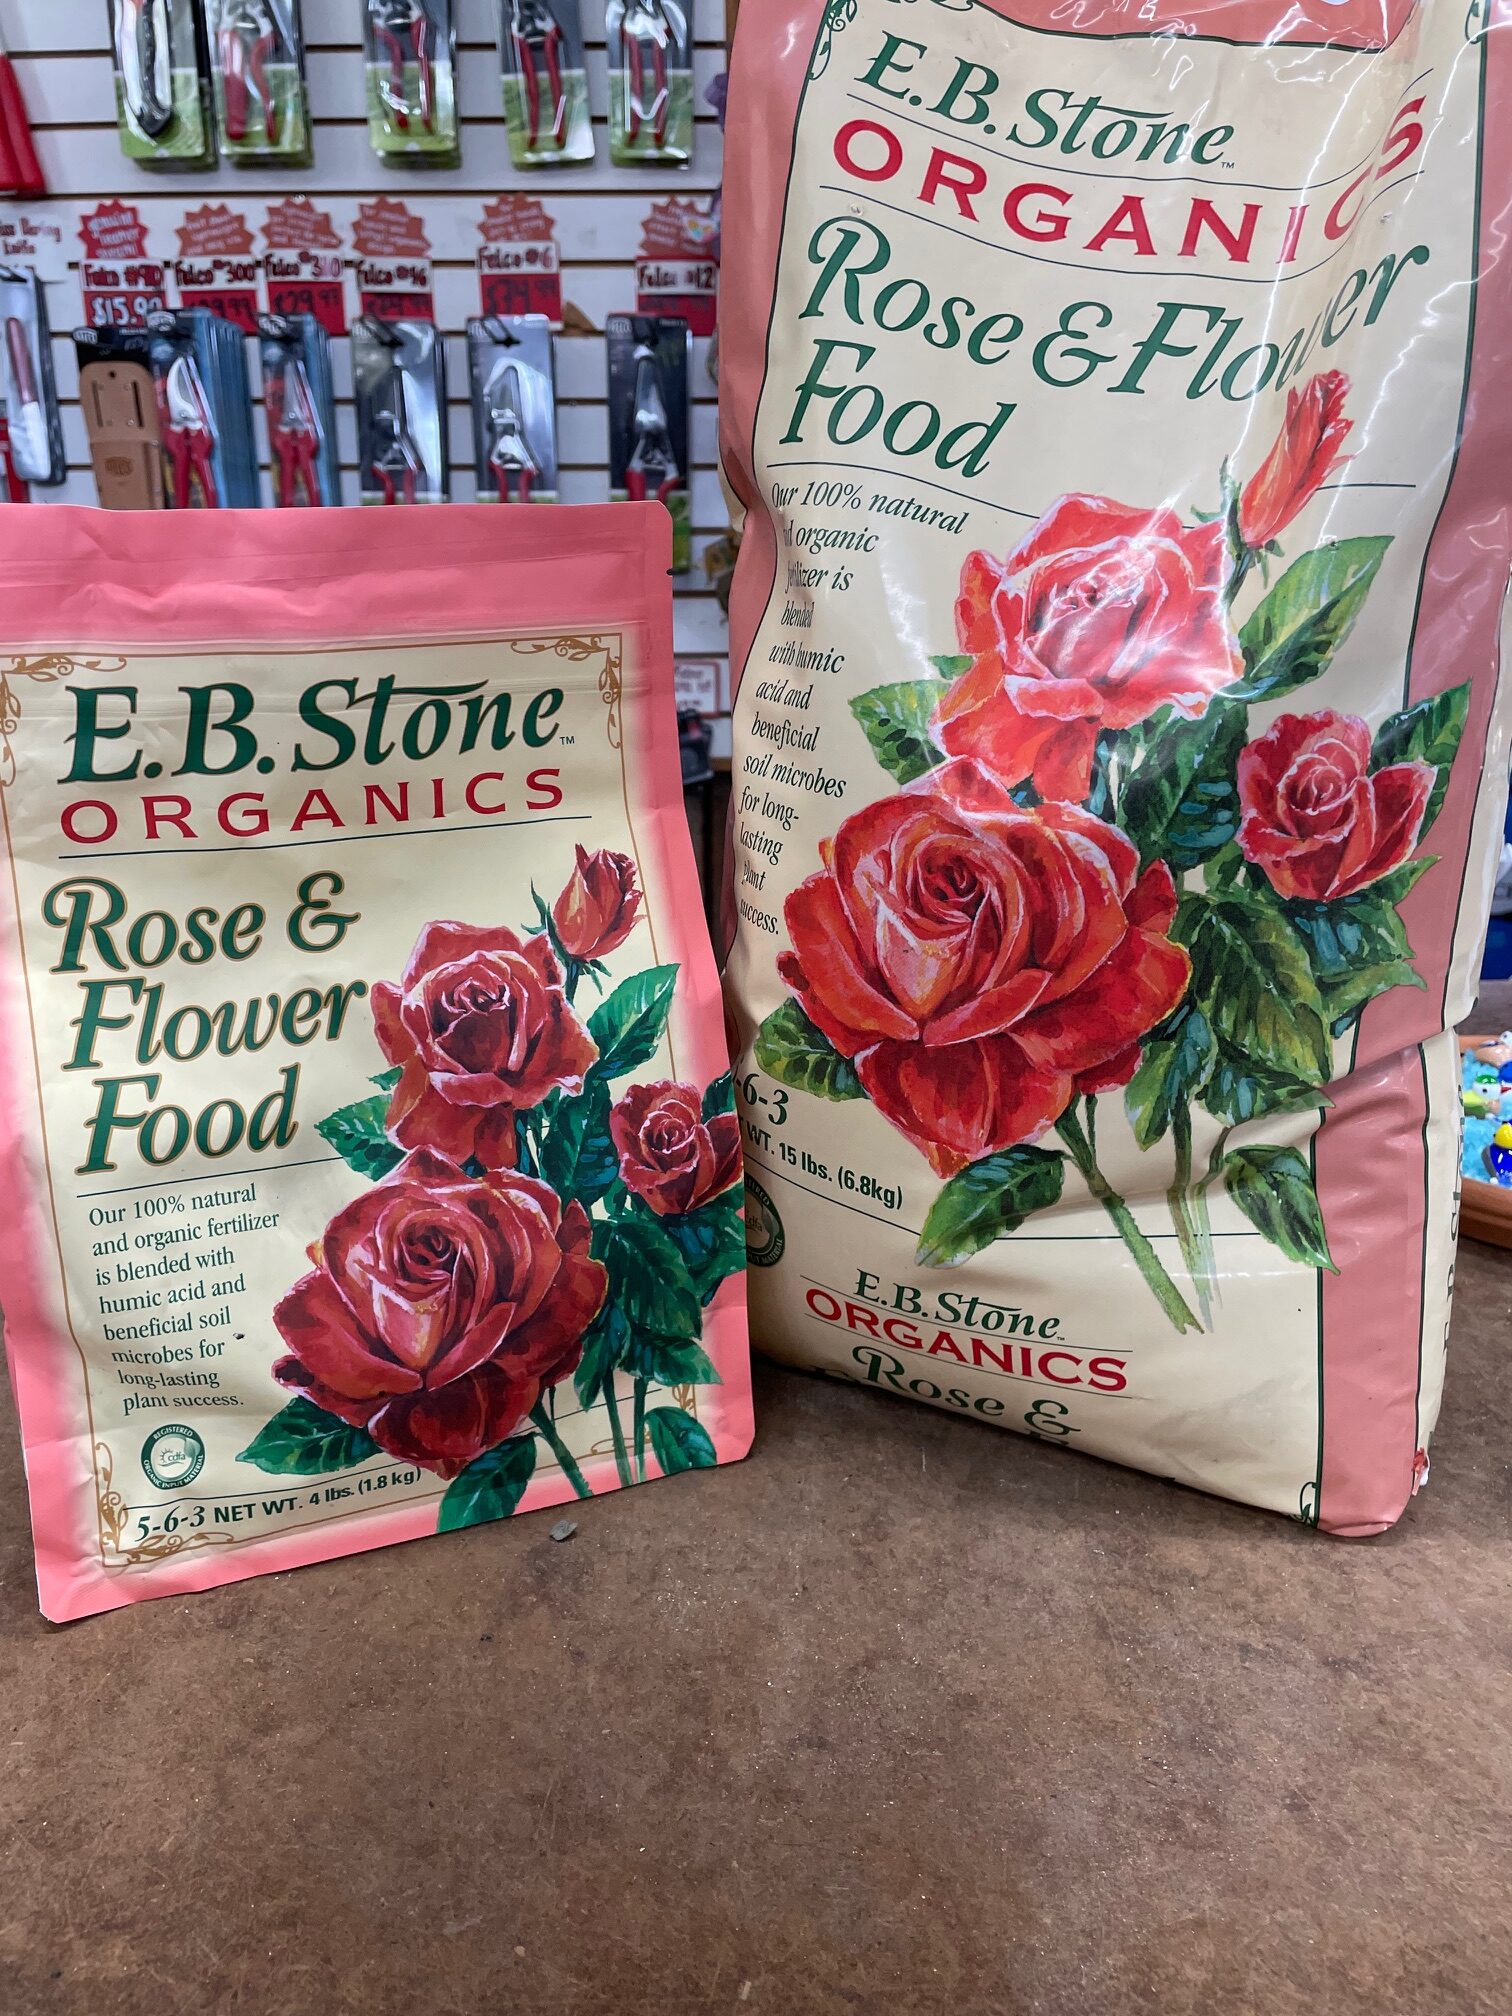
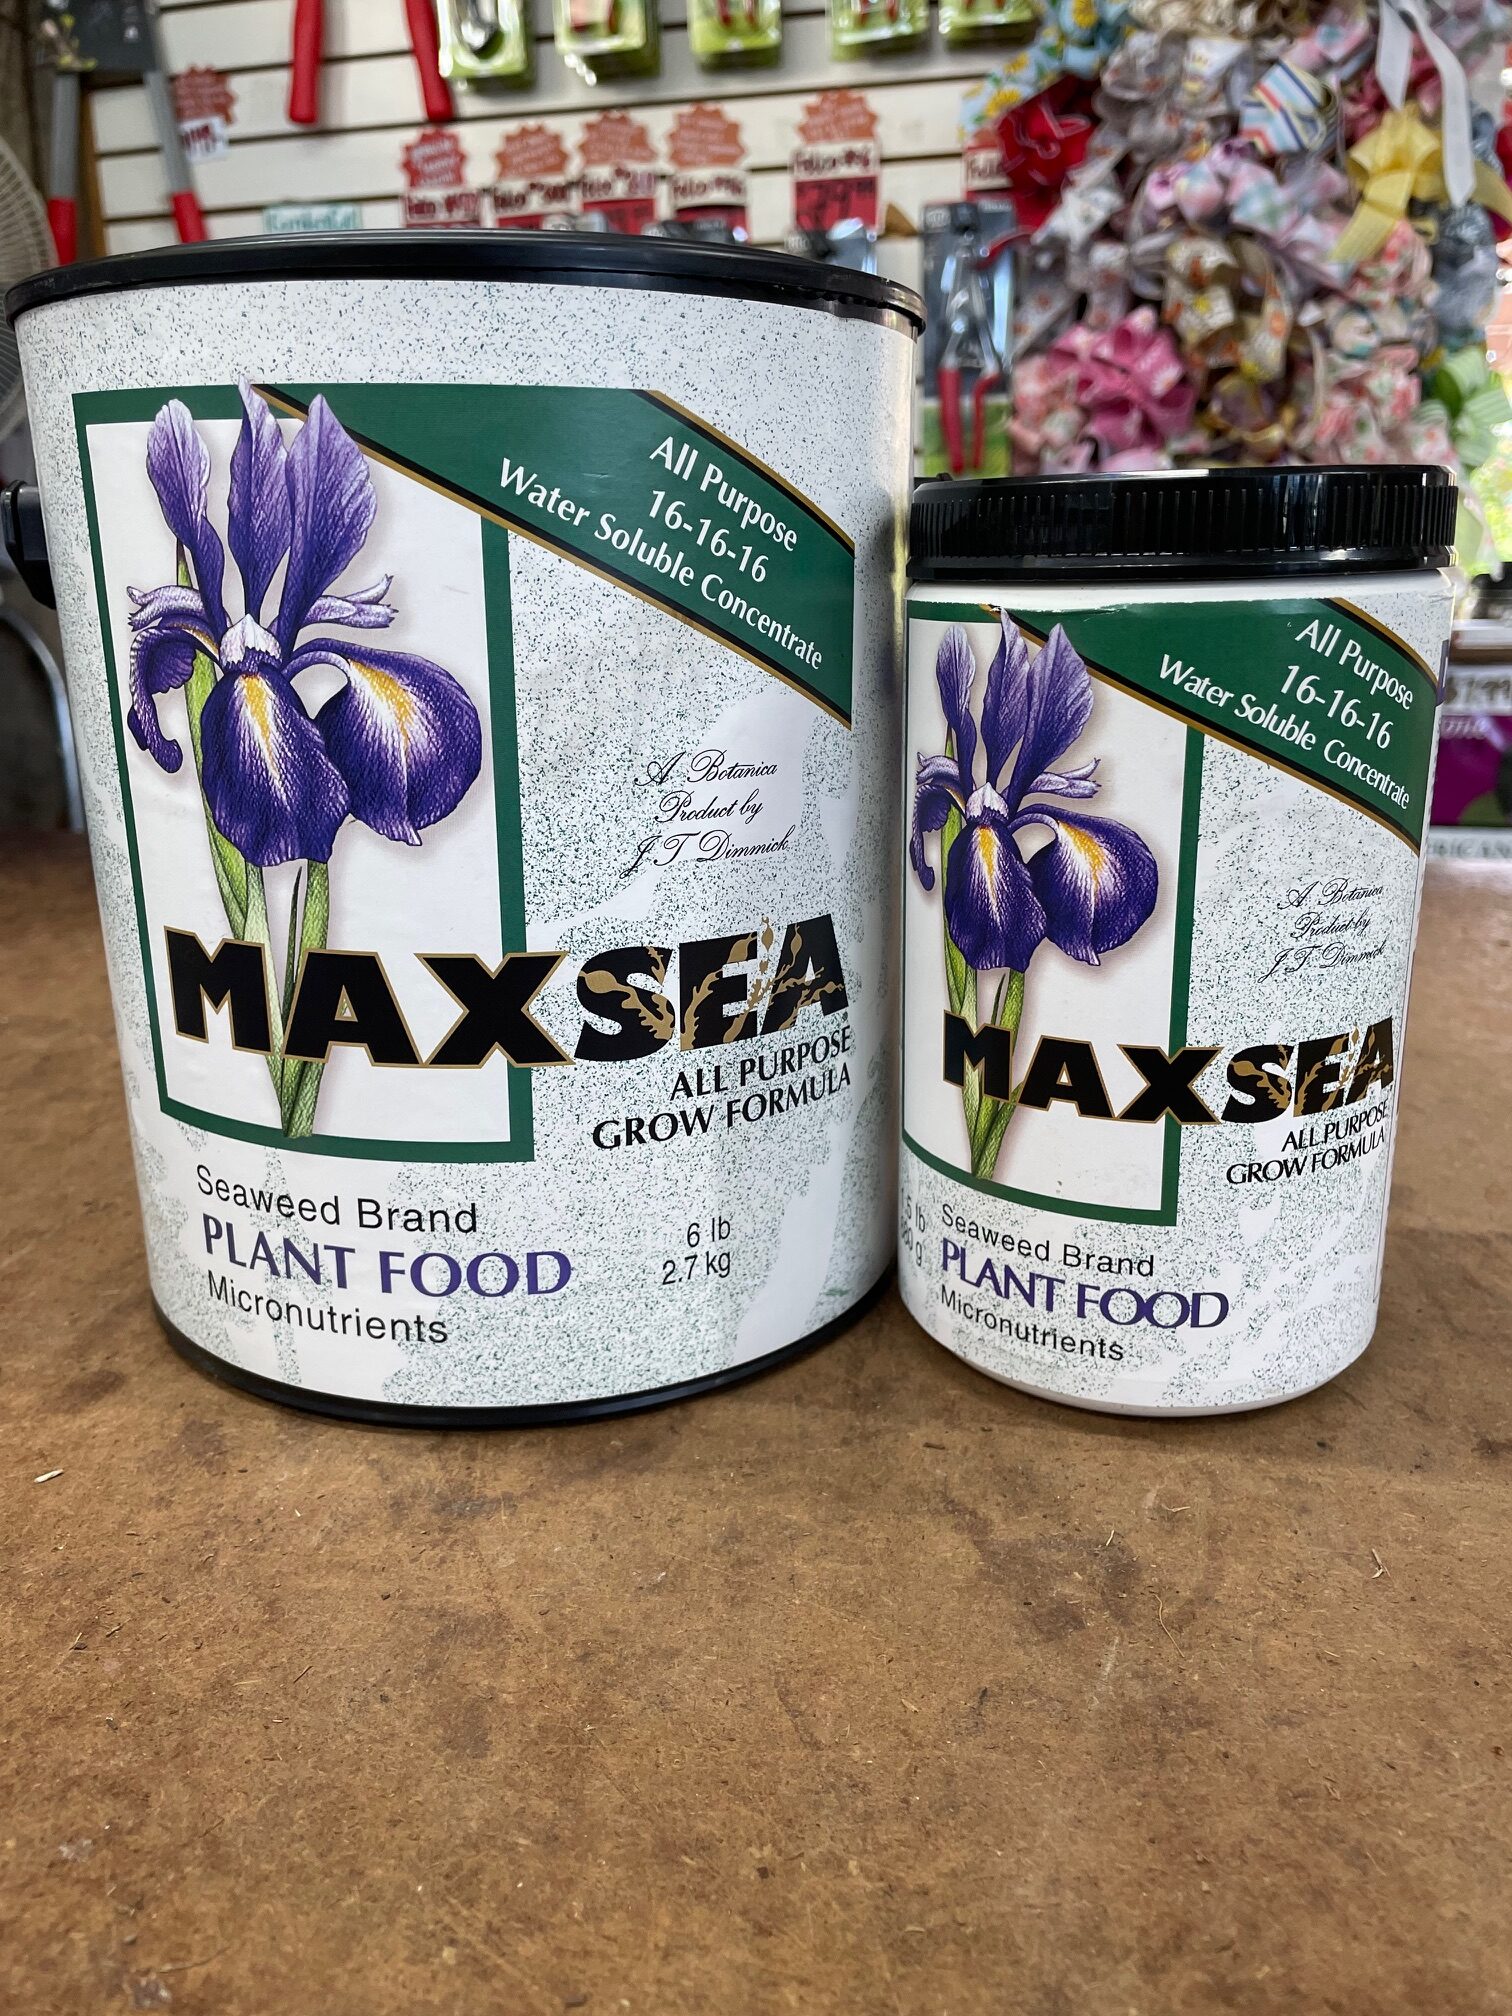
It is important to feed your flowers regularly. We love using EB Stone Organic Rose and Flower food for all of our blooming plants. Use some at the time of planting, then follow up every 4-6 weeks. For quicker action, you can also use Maxsea All Purpose plant food. This is a liquid fertilizer that is faster absorbing, so it packs a punch. We will use this in junction with EB Stone fertilizer with great success.
by King's Nursery | Jun 26, 2025 | General, How-to Info
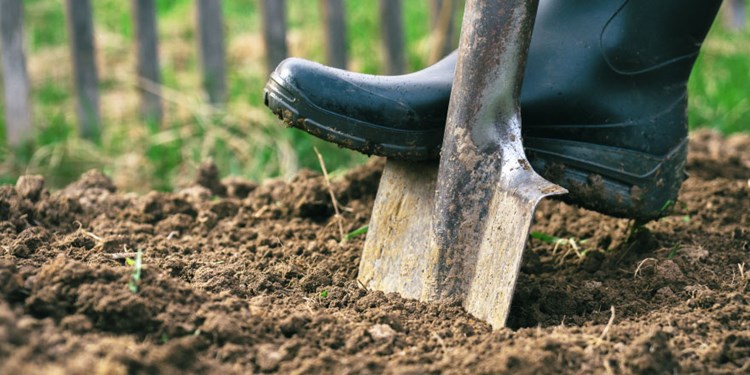
Building up your soil is the first step to a healthy garden. Organic material, mineral content, water and air are the main building blocks in a healthy soil ecosystem. In the right balance these components support proper moisture level and nutrient retention.
For most Sonoma County residents clay-loam is our typical soil. It’s comprised of compacted, fine ground particles and is often very dense and somewhat difficult to work with. Mixing in additional organic material is going to create space between the particulate matter, allowing a more workable texture. We love using Paydirt for that. It is loaded with nutrient rich Chicken Manure and Mushroom Compost, and is well loved by all plants. It is important to continue adding in Paydirt to your soil each season, to maintain healthy nutrient levels and proper soil texture.
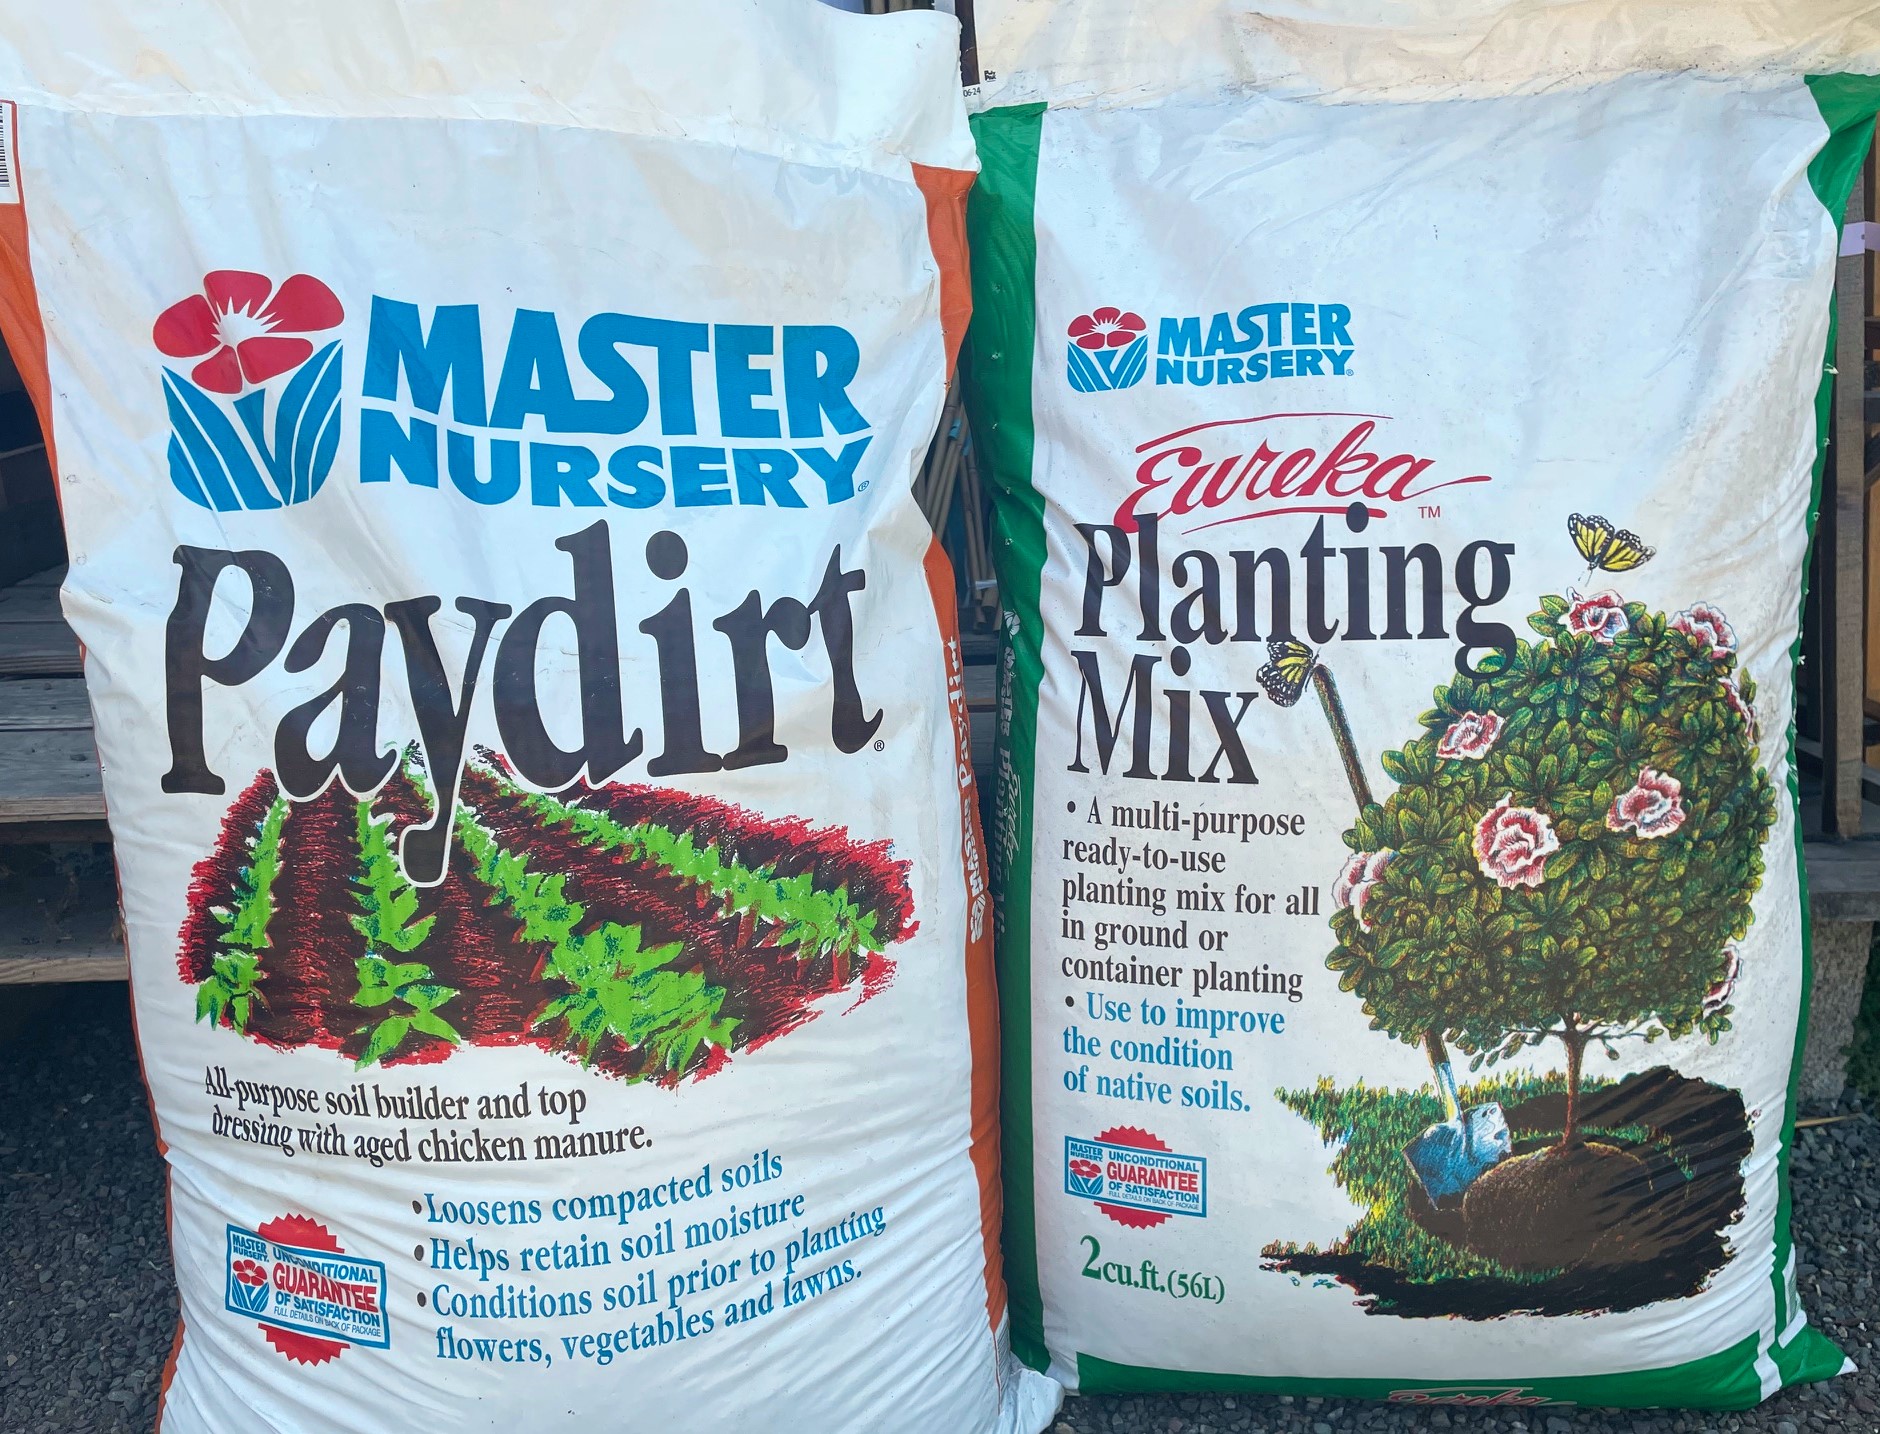
A great companion for Paydirt is our Eureka Planting Mix. It has Perlite and Gypsum in it, which helps prevent soil compaction. This allows the soil structure to be maintained even after some organic matter is depleted. This encourages an evenly draining soil, and allows air flow in the substrate. We recommend using a 1:1 ratio of Paydirt and Eureka Planting Mix.
If you have any questions about things specific to your garden, feel free to stop on in! We are always happy to give some ideas and tips on things that might best suit your situation.
by King's Nursery | May 31, 2025 | General, How-to Info
It’s the perfect time to plant all sorts of flowering goodies! We’ve got options for cut flower bouquets, lovely bedding flowers, and host plants for pollinators. Below is a general list of some popular sun and shade flowers. We of course have lots more choices, come on by and check out what we’ve got!

Marigold
They will bloom all the way until frost, and are loved by bees. Nice and easy, they also make a great companion with your veggie garden. Certain varieties also make a lovely cut flower.

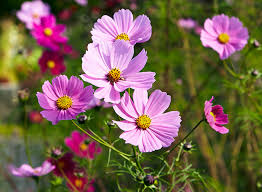
Cosmo
Very fast growing, these daisy-like flowers make nice bouquet fillers and are a nice addition to a wildflower garden. Light and airy foliage adds nice textural variance. Easy to grow!
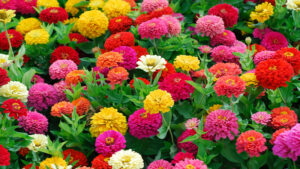
Zinnia
Quick growing, pollinator magnet. Bees love it, and butterflies will visit them as well. A favorite for cut flower enthusiasts with its nice long stems. Available in a wide range of colors and sizes.
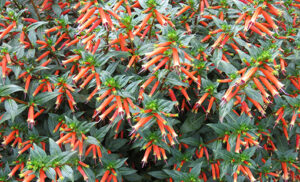 Cuphea
One of our personal favorites here at King’s! Bright orange tubular flowers explode on this shrub. Bees can’t stay away from it, and hummingbirds frequent it as well. A must-have for a pollinator bed.

Salvia
A robust perennial, Salvia is a pollinator MAGNET. Bees go crazy for it, and it will also draw in hummingbirds. A repeat bloomer and perennial, Salvia is a staple for all Spring and Summer gardens. Available in a wide range of colors and sizes, they will fit in anywhere! Water-wise once established.

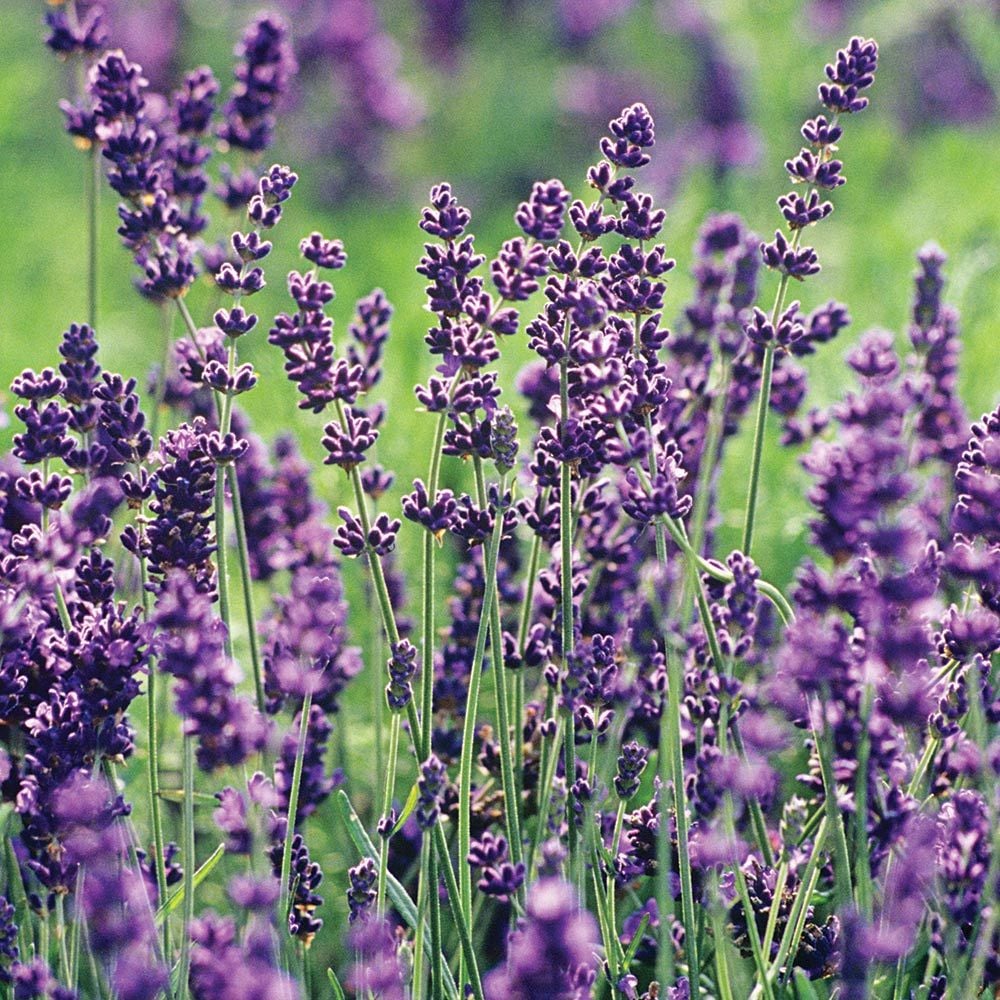
Lavender
A tried and true perennial flower, Lavender offers a lovely fragrance along with some nice purple blooms. A popular stop for bees, Lavender is a great option for a pollinator garden. A low water option once established.
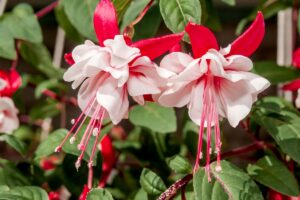 Fuchsia
One of our favorite shade flowers! Available in both trailing and shrub forms, Fuchsia are a necessity for your shady area. Add some smaller ones to pots, or in hanging baskets for non stop cascades of color. Larger ones make awesome specimens in the yard. They will be frequently visited by bees and hummingbirds!

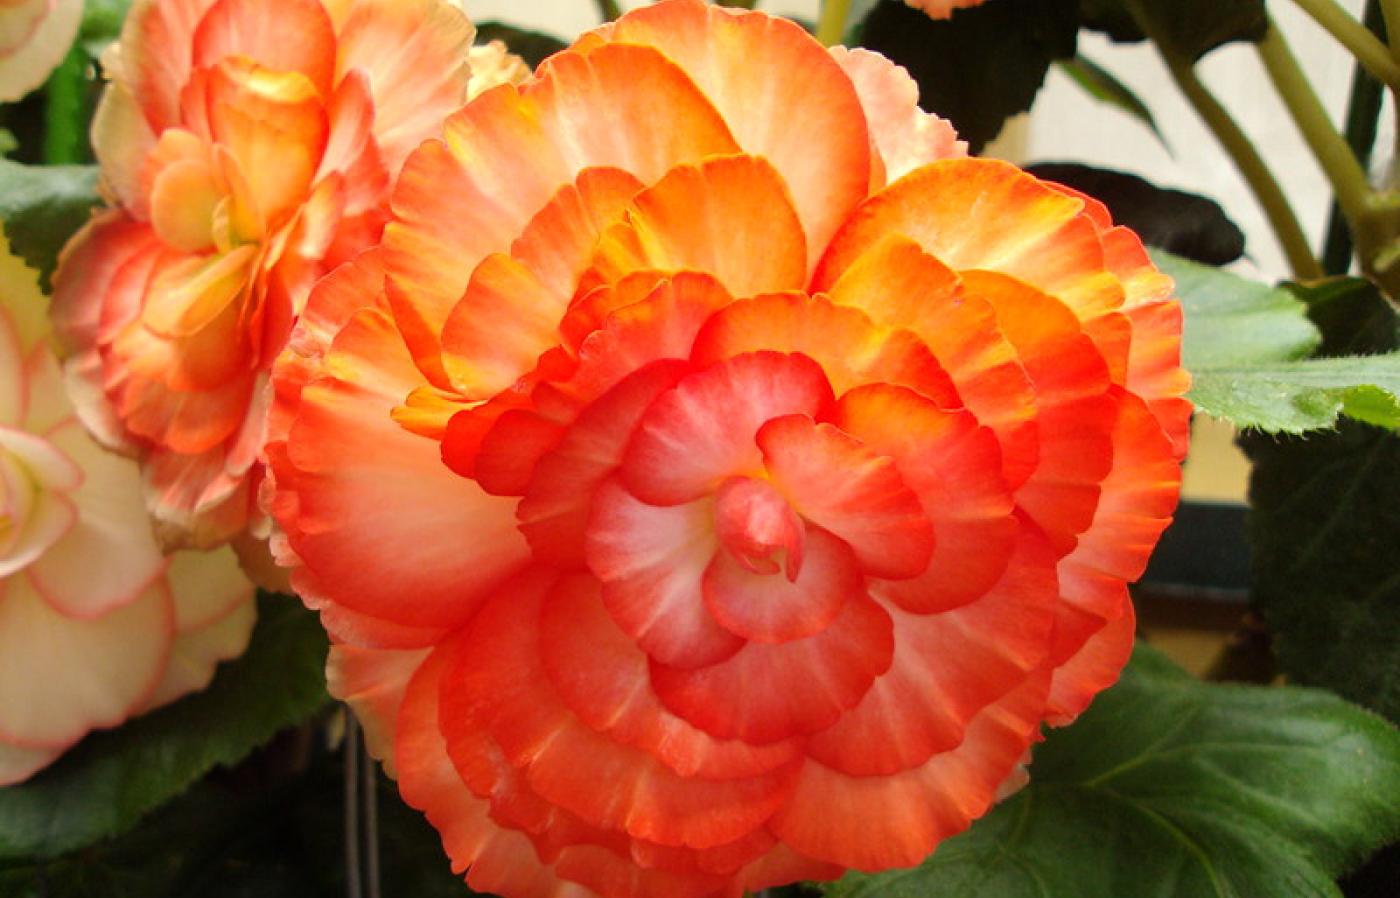
Begonia
A true classic! Begonias are known for their large, showy blooms sitting atop deep green foliage. Coming in both trailing and upright styles, Begonias look great in any shade pot or basket. They are grown in a range of hues from whites and yellows, to pinks and deep reds. We carry some of the most unique ones, including some upright kinds with HUGE blooms. Come check them out!
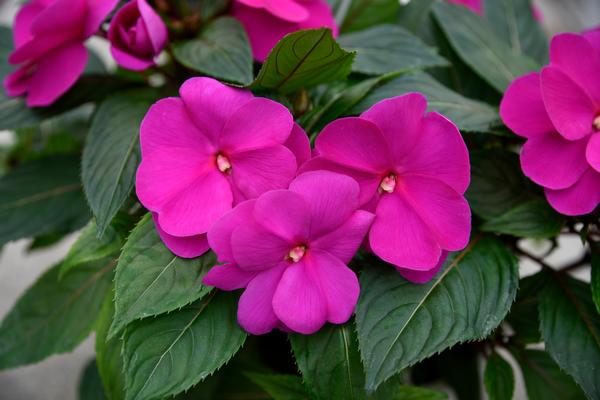
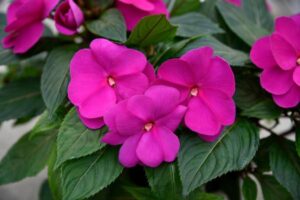 Impatiens
A long-time favorite for shade gardens! Impatiens are low-growing flowers that work great as border plants or fillers in pots and baskets. Additionally, there are some newer Hybrids called “New Guinea” Impatiens. These babies are a bit beefier, and tend to handle a bit more sun. We carry both kinds all season.
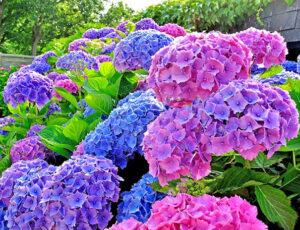
Hydrangea
A great perennial option for the shade. Hydrangea are robust, flowering shrubs that will come back year after year. Available in many different styles, including Mop-Head, Lace Cap, and Paniculata (conical). They bloom for a LONG time, and they also make a lovely dried cut flower. Some varieties of Mop Head can have their color “blued” by adjusting the acidity.

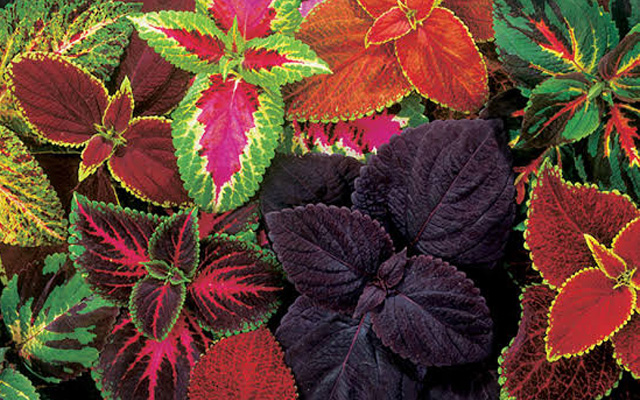
Coleus
Grown for its bright, vibrant foliage, Coleus is a unique addition to the shady collection. Coleus offer a nice break in texture while still having great pops of color. Tuck them in with some low growing things as an eye catching addition. Small flower spikes will emerge from the tops.
Soil Types
Setting up your flowers with the best soil will ensure you have a great batch of blooms this season. For anything going into a pot, we use Master’s Pride Potting Soil. It is well balanced, and suits the growing needs for all sun and shade plants.
For in-ground or raised bed gardens, we recommend using Paydirt to amend the planting area. If the planting area is especially compacted, or if you need more volume to fluff things up, add in some Eureka Planting Mix. Eureka Planting Mix is also a great soil conditioner that will increase drainage and aeration.
Fertilizing
It is important to feed your flowers regularly. We love using EB Stone Organic Rose and Flower food for all of our blooming plants. Use some at the time of planting, then follow up every 4-6 weeks. For quicker action, you can also use Maxsea All Purpose plant food. This is a liquid fertilizer that is faster absorbing, so it packs a punch. We will use this in junction with EB Stone fertilizer with great success.
by King's Nursery | Sep 2, 2019 | General, How-to Info

At Kings we just love sweet peas mostly because they do a bunch of things. They are reasonably easy, they grow during the cooler months, they can climb or ramble, they are very cut-able and they smell wonderful. Here are a few tips on sweet peas so you can have fun and success.
When to plant: As mentioned, Sweet Peas like the weather on the cool side, on the other hand, they need a bit of warmth to germinate and eventually bloom. In Sonoma County you may direct seed into the prepared soil in August, September and October. This gives the plants time to sprout before it gets cold. Normal frosts will not kill the plants. Indeed, during the cool winter, the roots continue to grow providing strength in very early Spring. If you have missed the direct seeding time, you may start them indoors and plant them outside anytime during the Winter and all the way through early Spring.
Location: Full Sun to no less than half a day of full sun.
Germination: Most folks find this pretty easy. In the ground, care should be taken to prepare the soil deeply, to about 12” or more if you are energetic. After working the soil, add Master Nursery Pay Dirt and Master Start and work again. Water so the soil is moist, not soggy and plant the seeds about an inch deep.
Keep evenly moist, but not soggy. Over watering can rot them. Another method would be to prepare the bed early and plant the seeds right when the Winter rains are starting. For indoors we use Master Nursery Potting soil right out of the bag, filling a six pack, small pots or greenhouse/flat kits designed for starting seeds. Again the seed is placed about an inch deep and watered several times thoroughly. Water thoroughly again when it is dry. There is no need for daily water, only when necessary. Germination can happen as soon as 7 days. Once sprouted, put them in a sunny location until the sprouts are a couple of inches tall, then outside to a sheltered spot, then into the garden or containers. Some folks soak the seed overnight before planting, we find that this is generally not necessary.
Growing: Most sweet peas need a structure. The exceptions are dwarf and knee high varieties, which can be grown with or without support and even in hanging baskets and on the sides of containers if you do not mind the sprawling look. Your structure can be as plain or as fancy as you like, but please make it sturdy and a bit bigger than you think that it ought to be. We have used bamboo hoops for smaller varieties, or redwood stakes for full sized ones. We have also attached a trellis to a large container with great success. Whatever the method you choose, remember that when the young peas reach out for support, they will need to be gently tied, especially at first and in a timely manner. As the stems age they can become a bit brittle, making the job difficult. We find that once they are started out on the right track they keep on track fine just by themselves. Spacing for new plants should be about 6 to 8 inches apart in your prepared soil. Please remember to work the soil. Your ultimate results are always tied to the soil. Subsequent feeding can be any complete food. We recommend slow release Osmocote or Master Nursery Multi Purpose. Whichever you choose, please do it. Those nasty snails can be a problem when your plants are young and defenseless. Put down plenty of Sluggo Plus to make sure all the crawling critters stay away.
Other Stuff: Keep the flowers cut. This is important and fun. Sweet peas are cool season annuals and will produce armloads of flowers if you cut the spent ones off as soon as they start to drop petals. This will provide you with non-stop bouquets with room-filling fragrance, and will bloom for weeks and weeks. As the weather warms in Spring, please water your peas consistently as this will also increase length of bloom.
by King's Nursery | Feb 21, 2010 | Custom Planting, Hanging Baskets, How-to Info
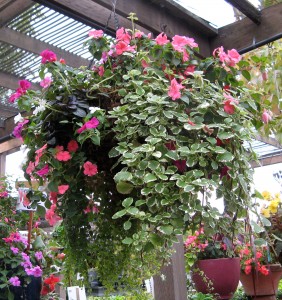
Living Bouquet Basket for shade
King’s has specialized in hanging baskets for many years. None are more fun to make or grow than the mixed baskets of flowers we call Living Bouquets. Planted and maintained correctly, they will give you an entire season of colorful blossoms. Making your own basket can be lots of fun, although quite a challenge for us to explain. The following is a guideline to get you started. If you have questions or need advice, drop by the Nursery; we’ll be happy to help.
What you will need:
A hanging basket, 12” in diameter or larger
A swivel hanger for the basket
Sphagum moss to line the basket
A bucket with water
Quality potting soil – we use MasterNursery “Professional Potting Soil”
Fertilizer – we use a combination of Master Start and Osmocote
A soil polymer such as SoilMoist (optional)
A selection of flowers, veggies, herbs, or greens
We need to grasp the concept that the moss is merely a liner around the basket used to hold in the soil. The moss is easy to work with when wet. That’s why we have the bucket. Submerge the moss in the bucket full of water. With the basket in front of you, take the moist pieces of moss out of the bucket. Smash the piece flat like a hamburger patty. Place the flattened moss in the bottom of the basket. Continue lining the bottom and sides of the basket, slightly overlapping flattened pieces of moss. Continue up the sides until you are about 1/3 of the way up. Remember the moss is merely a liner to hold the soil. There is no reason to completely fill the basket with moss. What you should now have resembles a bird’s nest in the bottom of the basket.
Into the nest, or depression, you want to pack in your potting soil/fertilizer mixture. Bringing it right up to the top of the moss. Your soil mix should consist of 1/3 cubic foot Potting Soil, 1/3 cup Osmocote, 2 Tbsp Master Start, and 1 to 2 Tbsp SoilMoist.
Now come the first of your plants. For a 12” basket, we only want to put 4 plants on the bottom layer. From the inside out – that means you are threading the foliage through the wire from the inside – place one plant at 12 o’clock, one plant at 3 o’clock, one plant and 6 o’clock, and one plant at 9 o’clock. Make sure the foliage extends outside the basket and the roots are inside, in good contact with the soil.
Smash down more moss and line the basket another 1/3 of the way up. Add more soil mixture to the top of the moss, packing down firmly, thus covering the roots of the plants already in the basket. On this layer put 6 plants, bracketing the 4 on the bottom row. When you have placed them to your satisfaction, continue lining the basket with moss all the way to the top, and slightly over the edge of the basket. Fill the basket to about 1” from the top with soil and pack down firmly. Plant 5 or more flowers in the top of the basket; 4 equaly spaced near the edges and one in the middle.
Carefully attach the wire hanger and water thoroughly but gently. You are now ready to hang the basket. Choose a location that is compatible with the plants you have chosen. As the basket matures, it will need more and more water. Daily during the summer is not too much. Water slowly and thoroughly. One gallon applied slowly is more efficient than three gallons squirted on. From time to time we feed with Maxsea, a superior liquid plant food.
When the season ends for your basket, you may salvage the basket, hanger, and some of the better moss. We always start over with new soil, fresh moss, and new plants. This produces a superior basket. That’s the entire procedure. Try not to skip any of the steps or materials as each is very important to the overall health and beauty od the basket. Remember, if you are confused, call or drop by the Nursery and ask for help. All of us at King’s have made many, many baskets and want yours to turn out great!
Finally, here are some guidelines for plant choices for your basket. Remember to put compatible plants together. All the plants in each basket should have similar requirements as to sun, water, etc.
Spring and Summer plants for the sun:
Lobelia
Petunia
Alyssum
Verbena
Marigold
Phlox
Zinnia
Golden Fleece
Bidens
Million Bells
Sanvitalia
Spring and Summer plants for the shade or part sun:
Impatiens
Lobelia
Schizanthus
Nemesia
Begonia
Mimulus
Bacopa
Fuchsia
Fall and Winter plants for sun:
Pansy
Viola
Winter Daisy
Dwarf Snapdragon
Toadflax
maybe Lobelia and Alyssum
Fall and Winter plants for shade and part sun:
English Primrose
Fairy Primrose
Cyclamen
Primula obconica
Ivy
maybe Lobelia, Nemesia, and Schizanthus
Let your imagination run wild. If you discover some new combinations that work for you, we’d love to hear about it…and see pictures!